This is a quick step by step tutorial on how to create a menu in WordPress. It includes how to add pages, custom links and more.
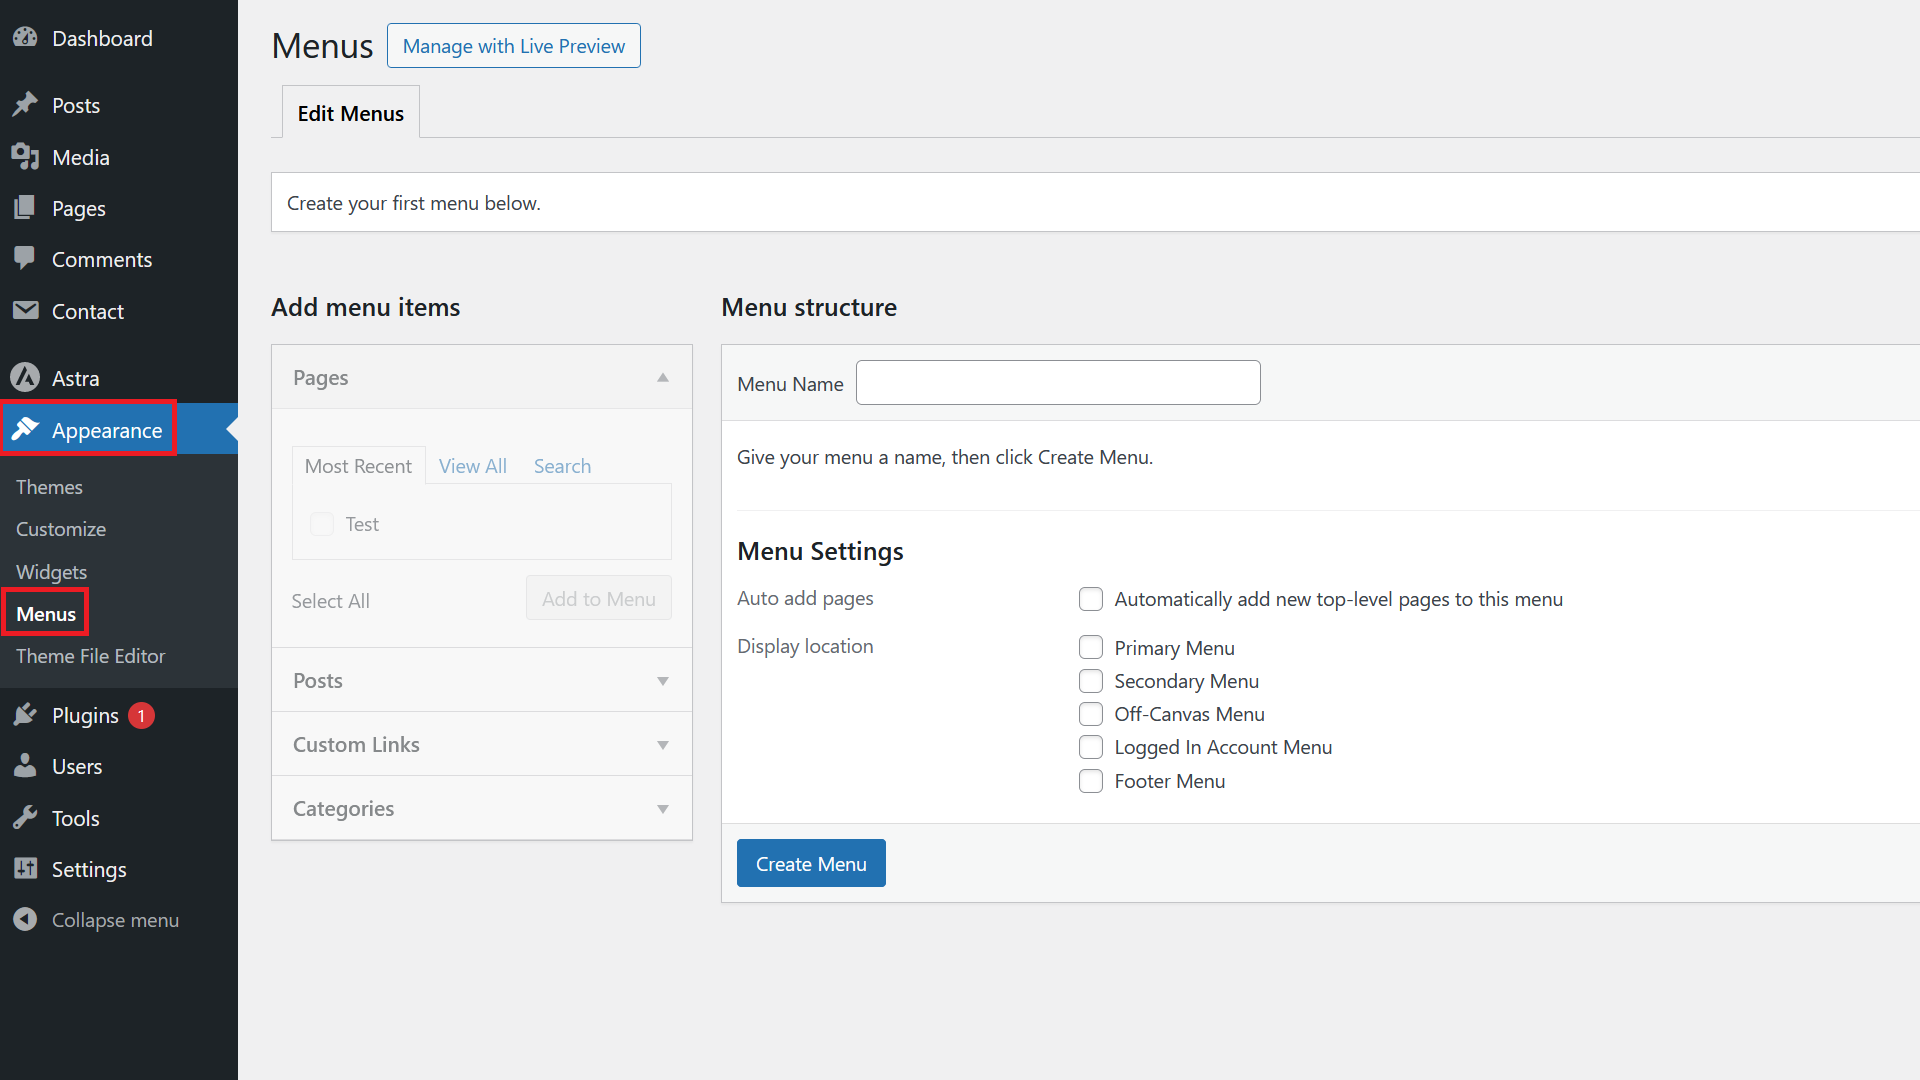
First, go to Appearance / Menus.
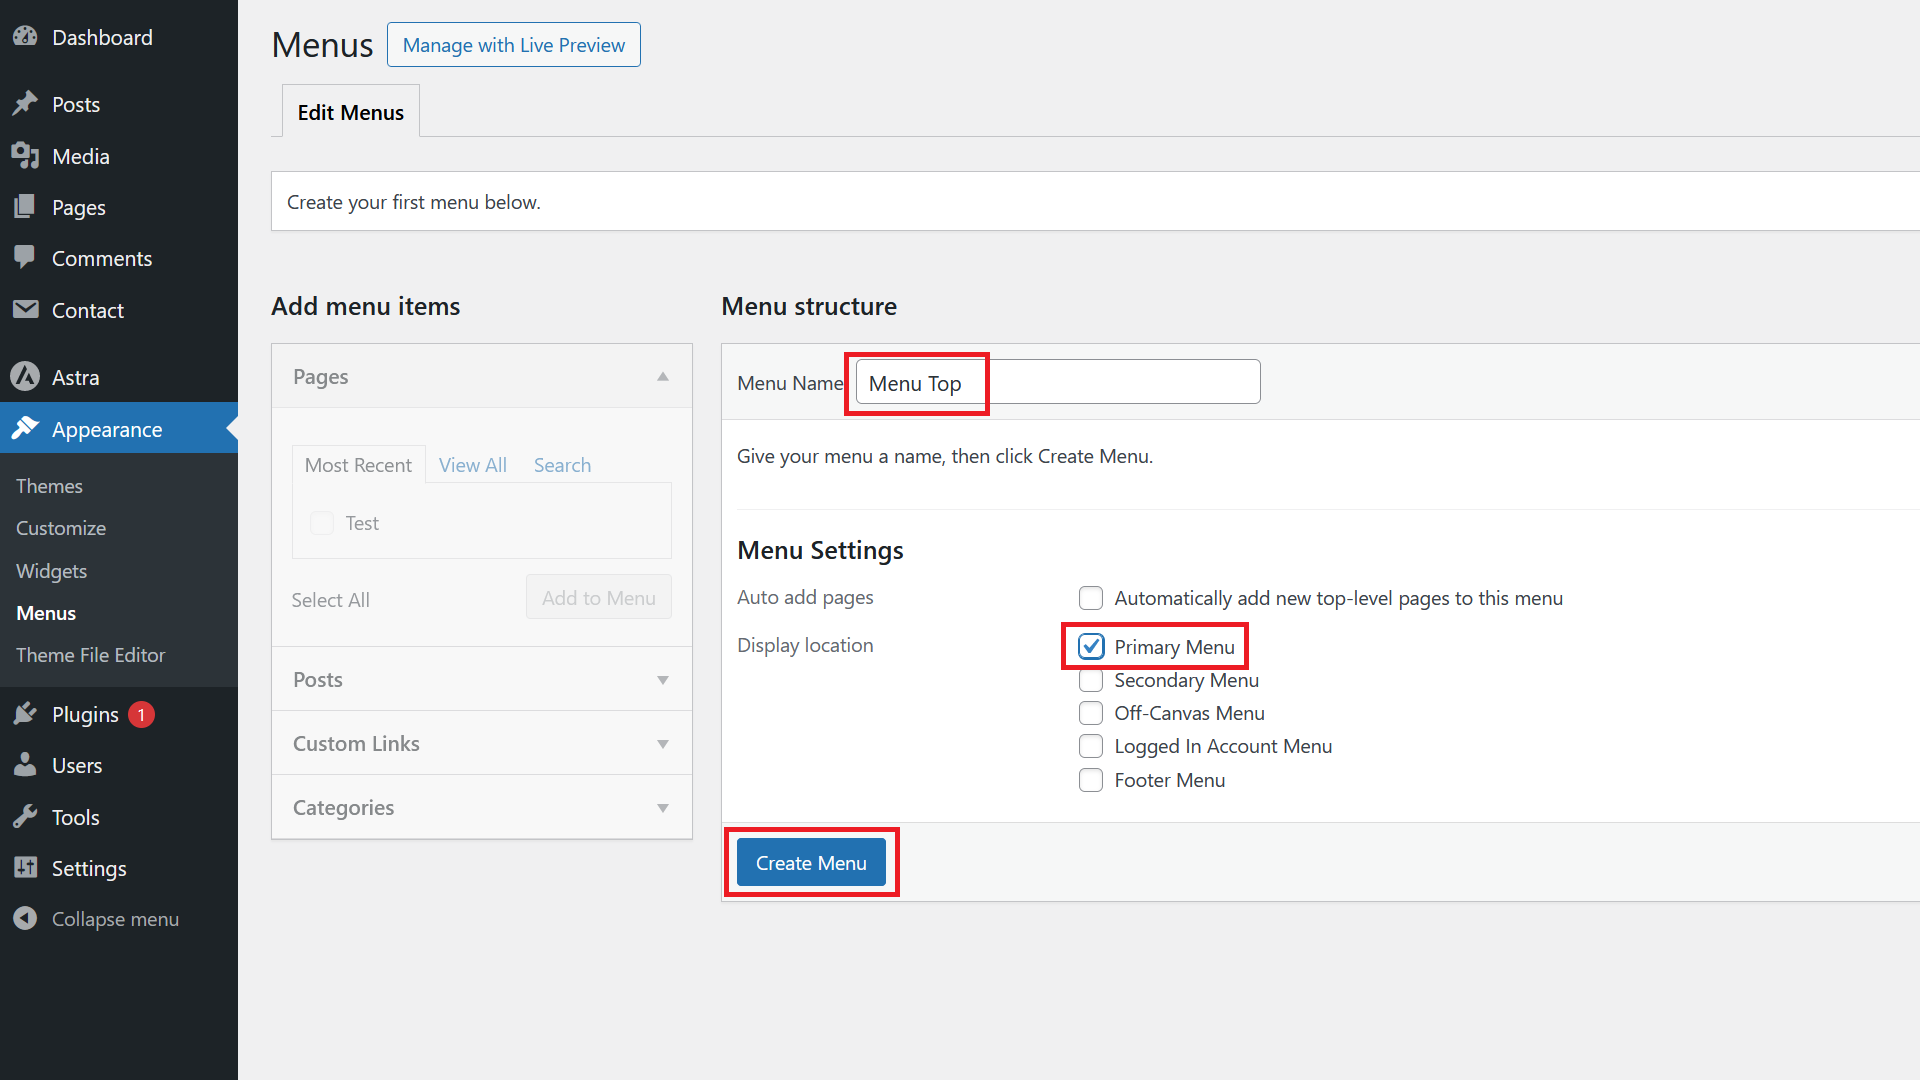
If there is no menu created yet, you can directly add a Menu Name, pick the Display location and click on Create Menu. The display location will depend on the theme you are using. The Primary Menu location is usually available and refers to the main menu on the top of the page.
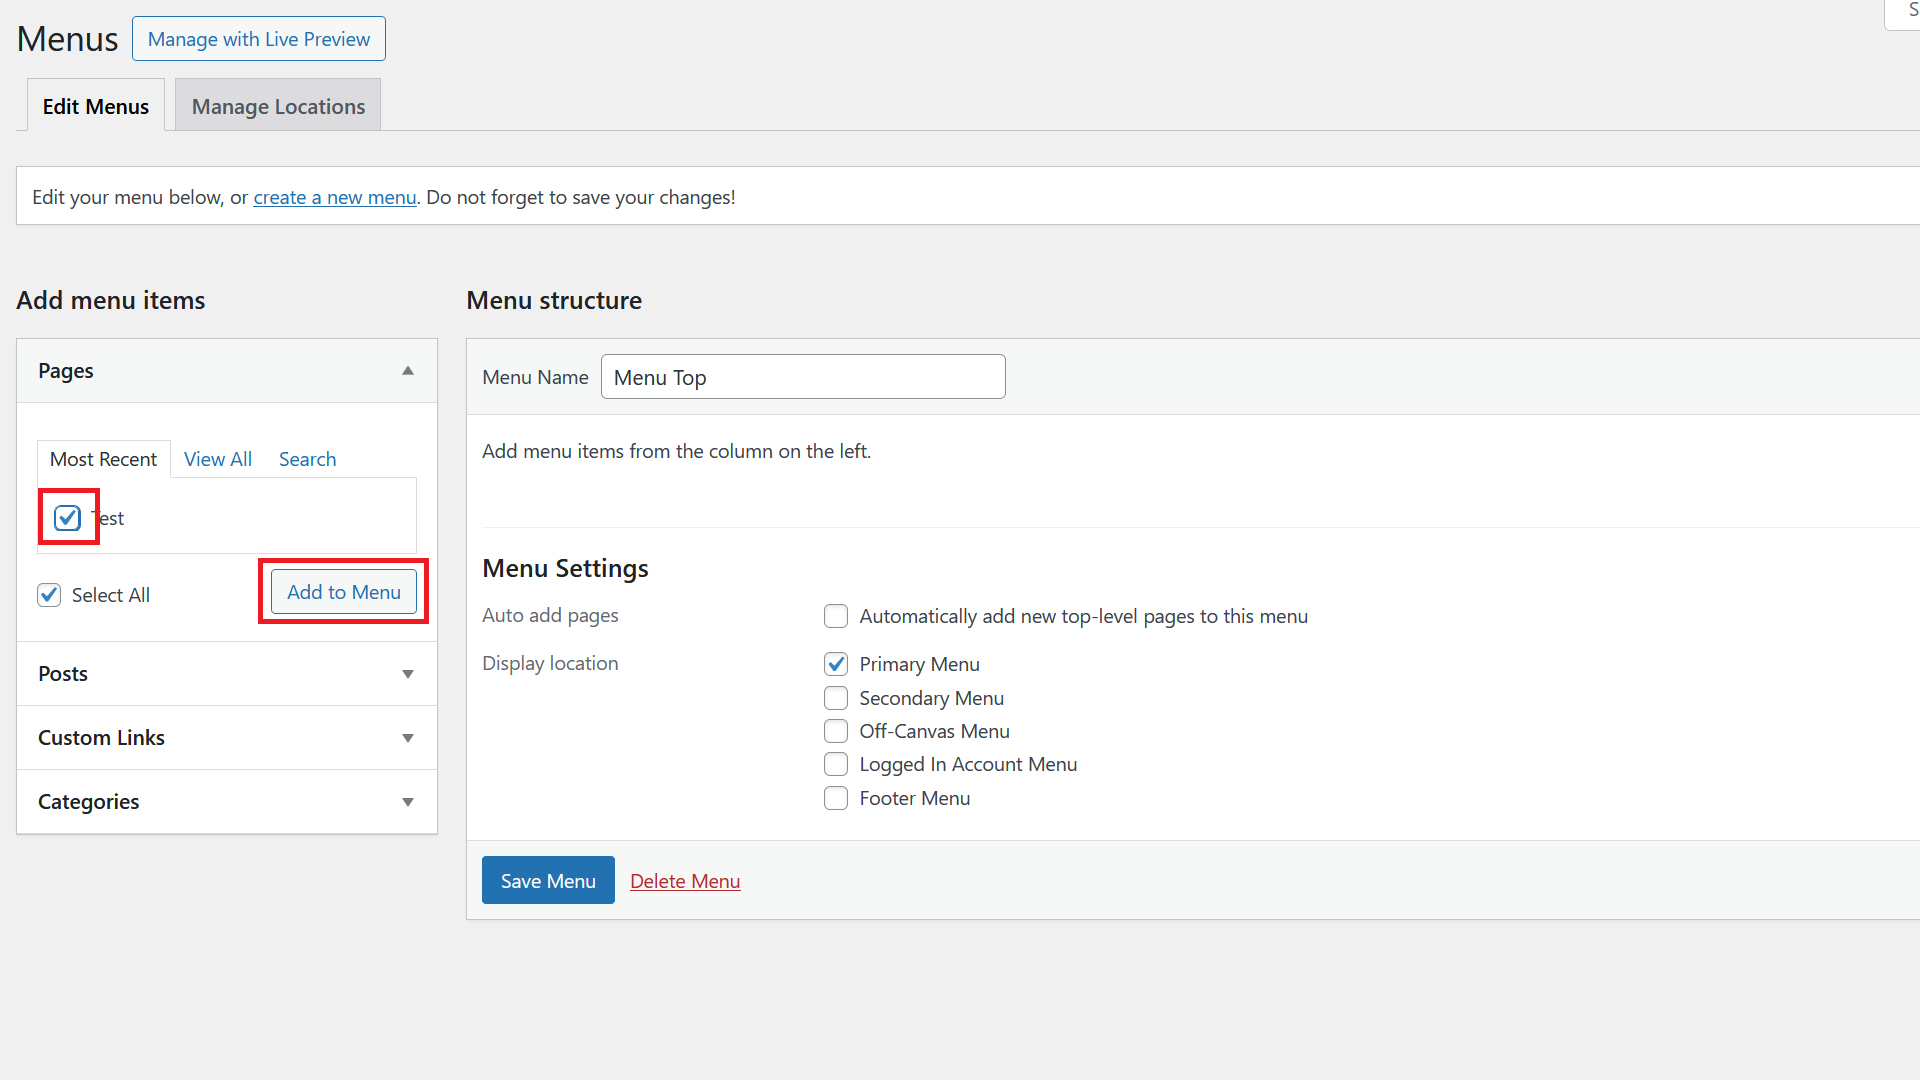
To add a page to the menu, pick the Pages section on the left, then tick the page or pages you want to add and click on Add to Menu.
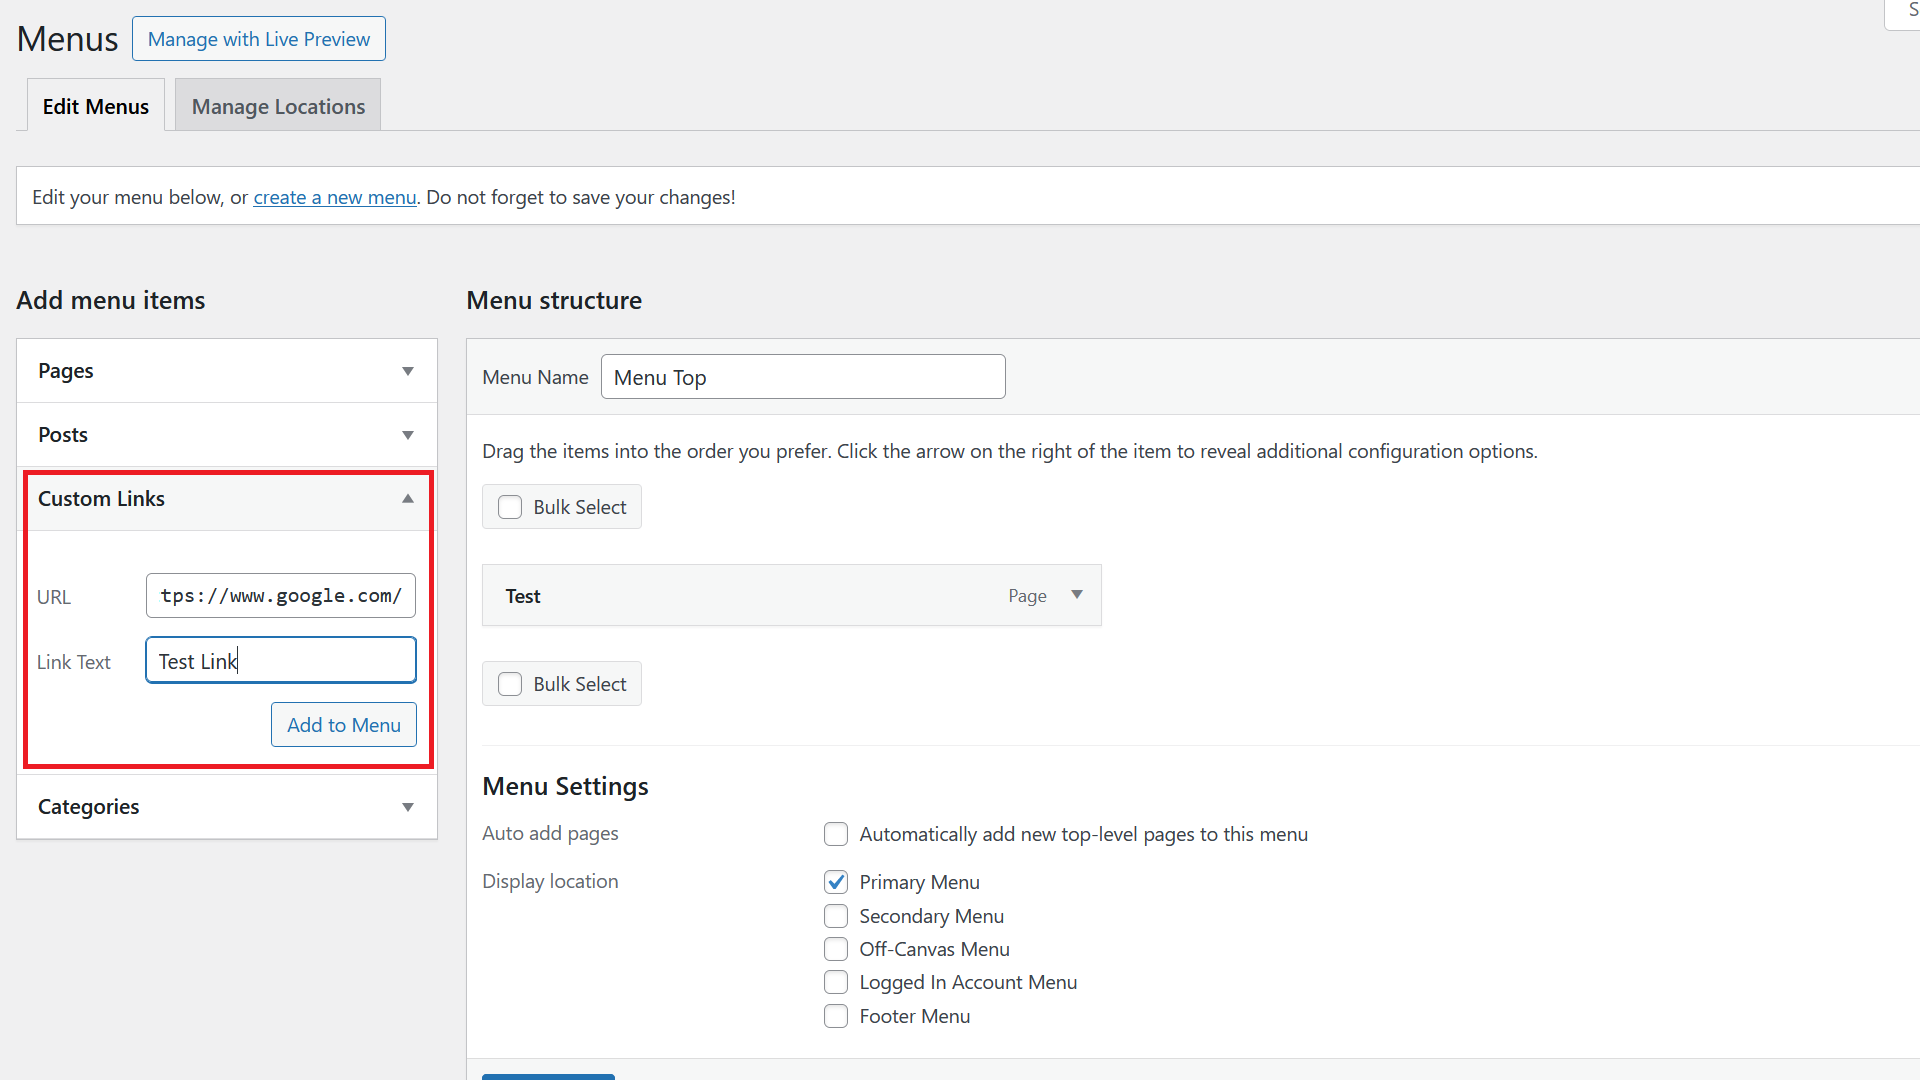
If you want to add a link to an external page, go to the Custom Links section, add the URL and the Link Text you want to show up in the menu and click on Add to Menu.
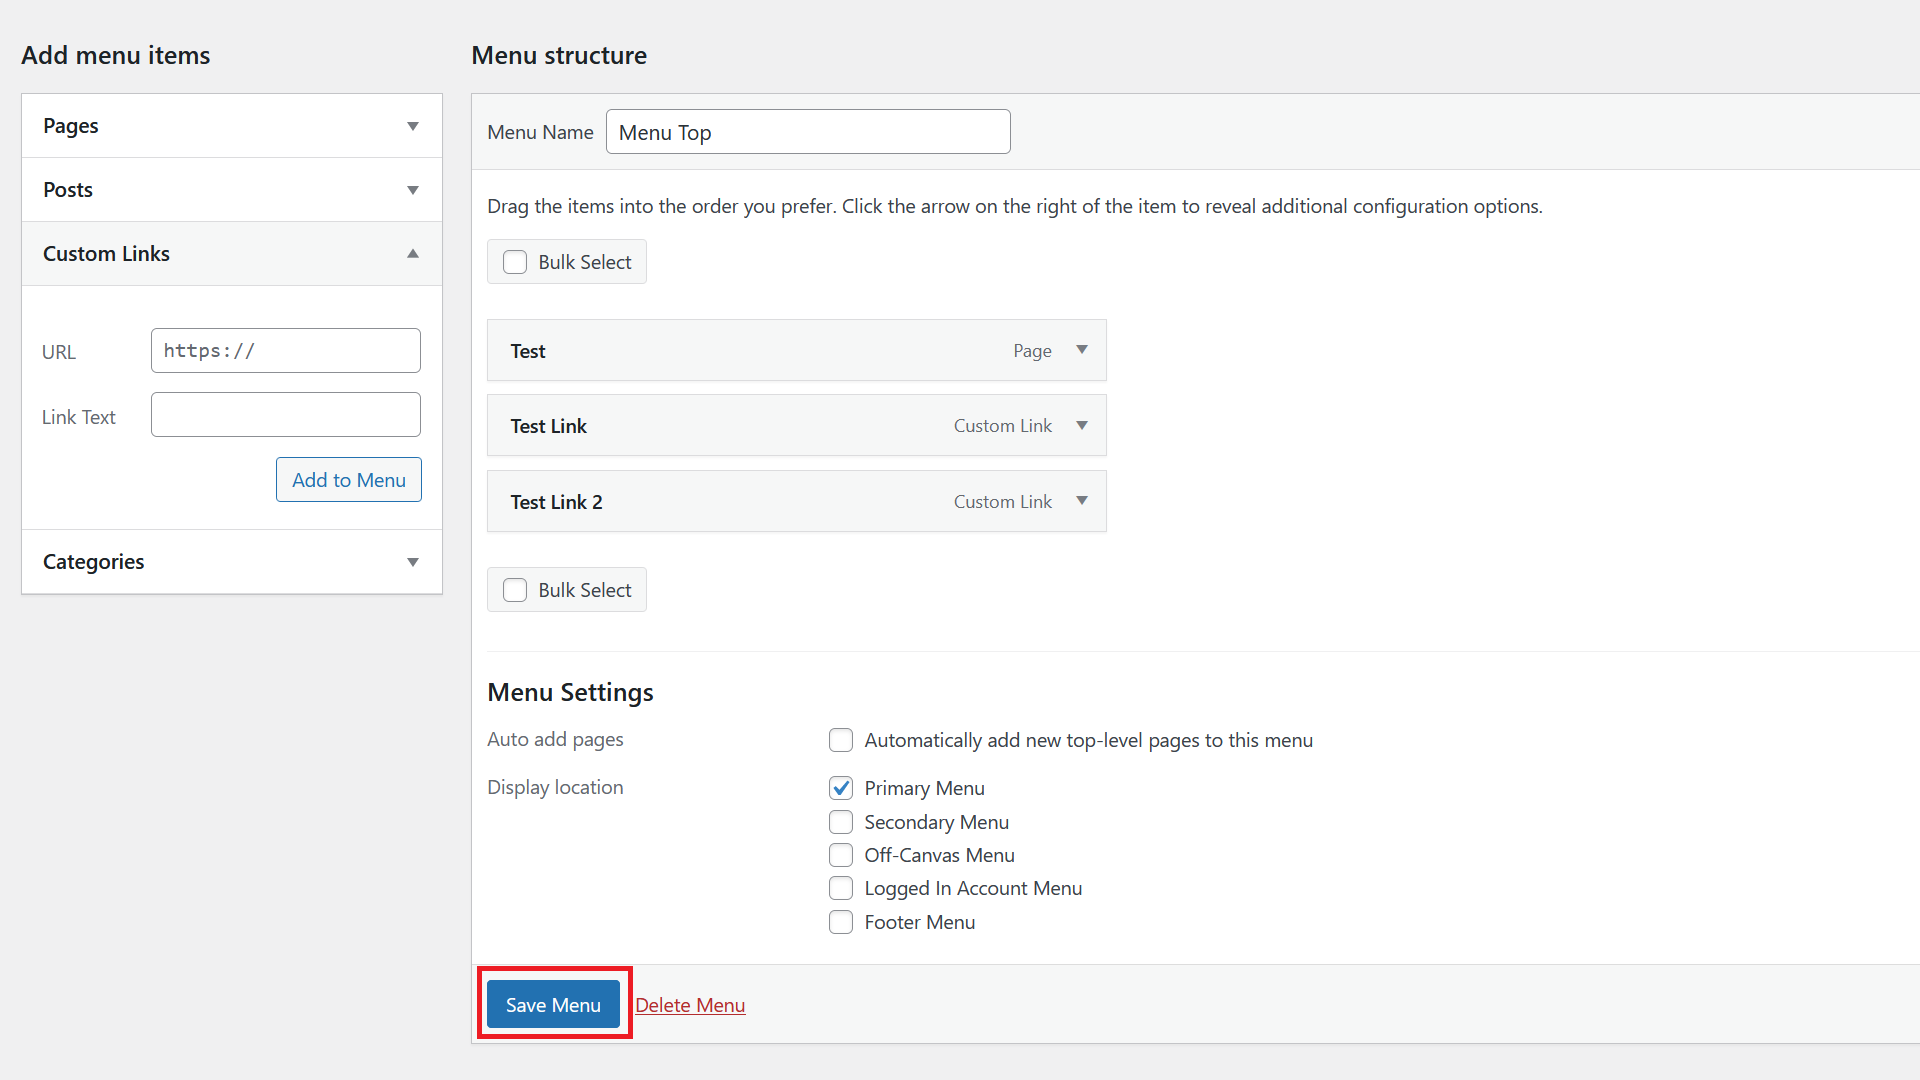
To finish the changes, click on Save Menu.
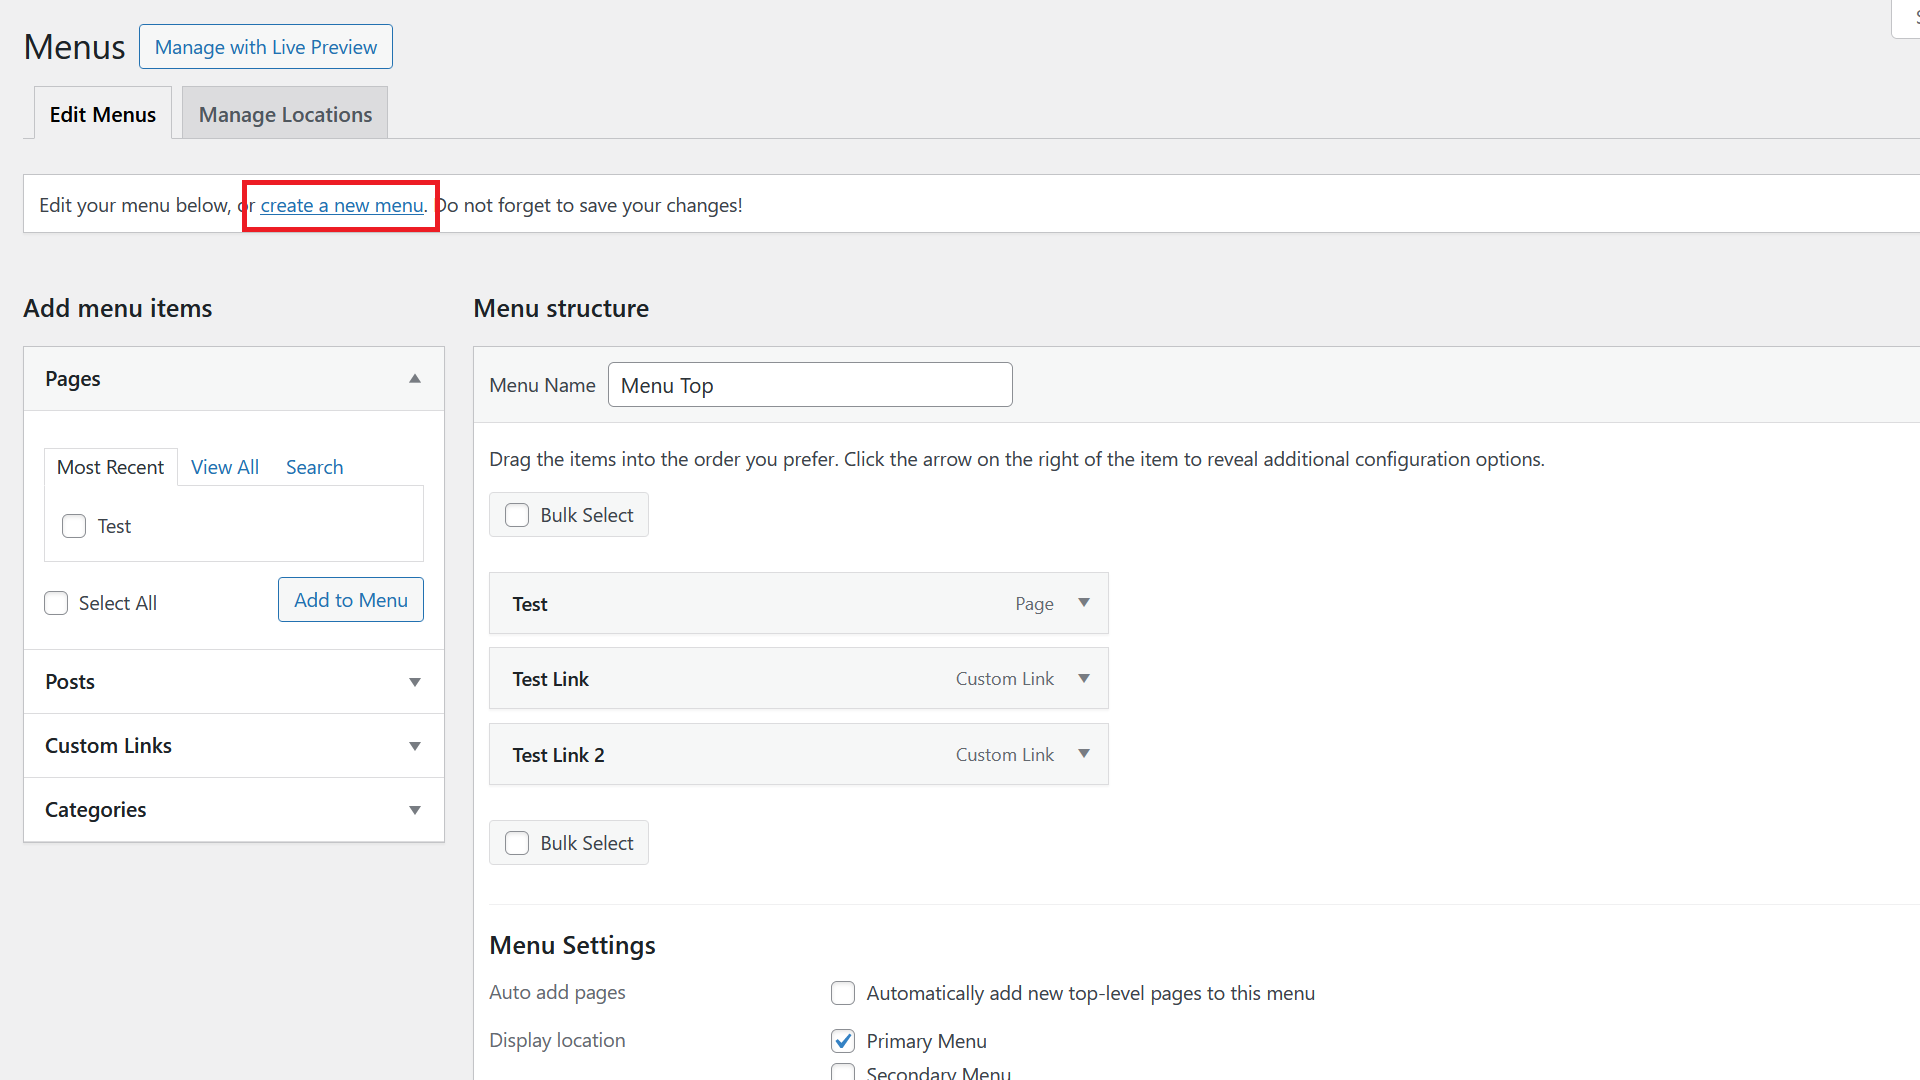
To create a new menu when there are existing ones, click on create a new menu on the top of the Menus area.
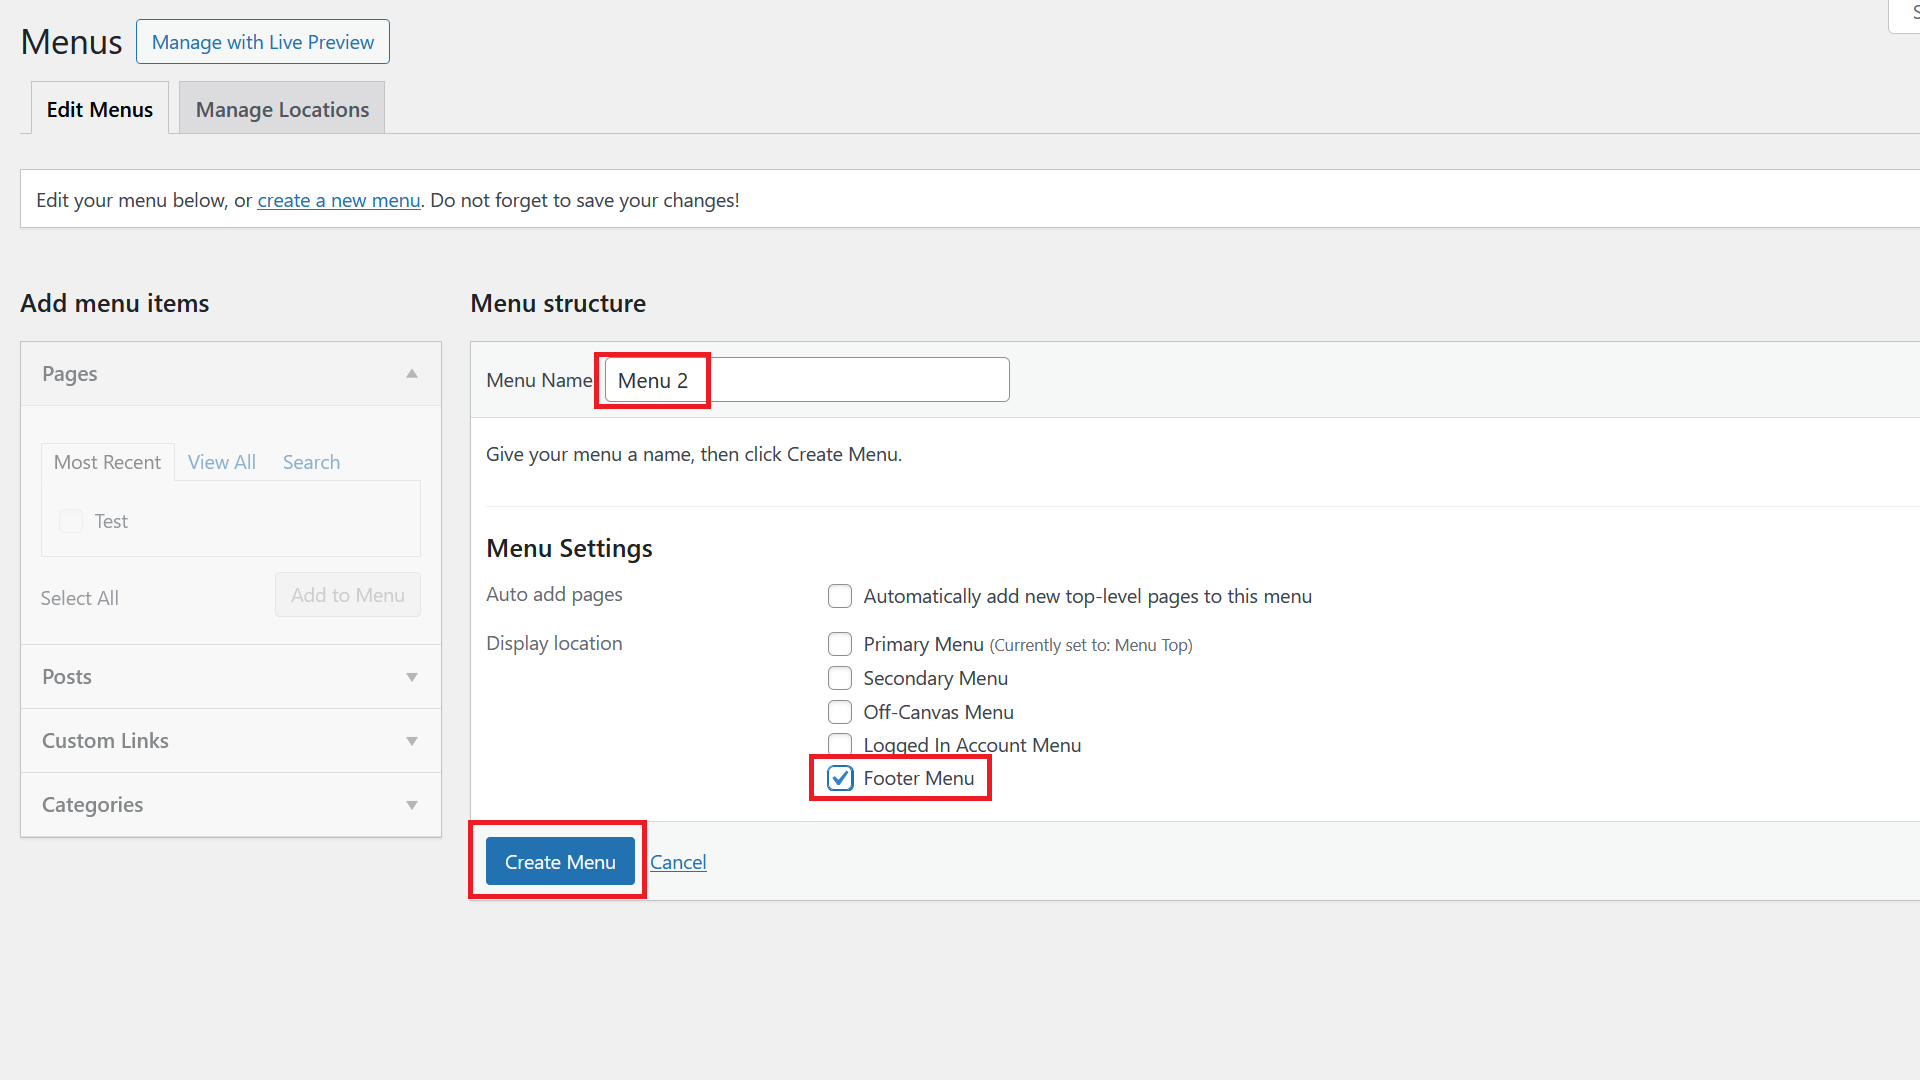
Then go ahead and create the menu like in the example before.

