This is a quick step by step tutorial on how to edit a menu in WordPress. This includes how to create a dropdown menu, how to open menu links in a new tab and how to add a class to a menu item.
What is covered:
How to Edit a Menu in WordPress
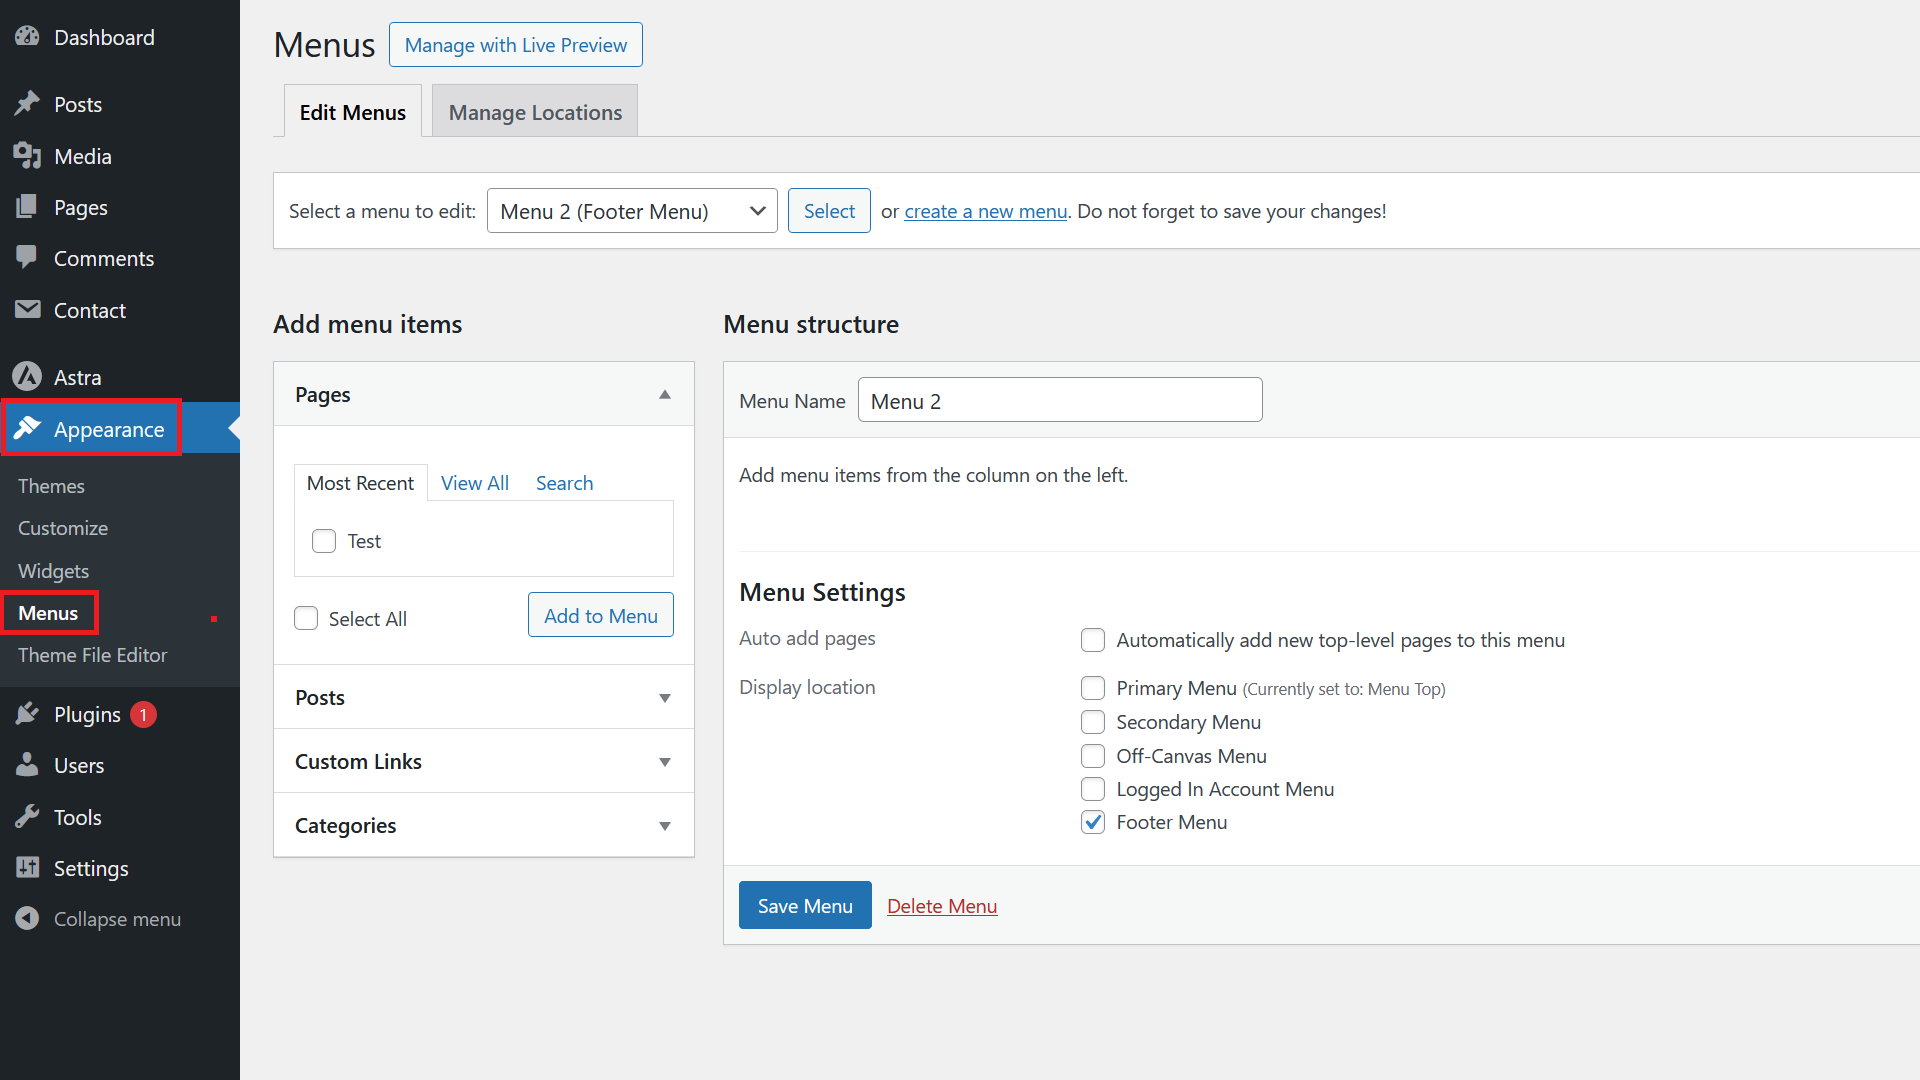
To start editing a menu in WordPress, go to Appearance / Menus.
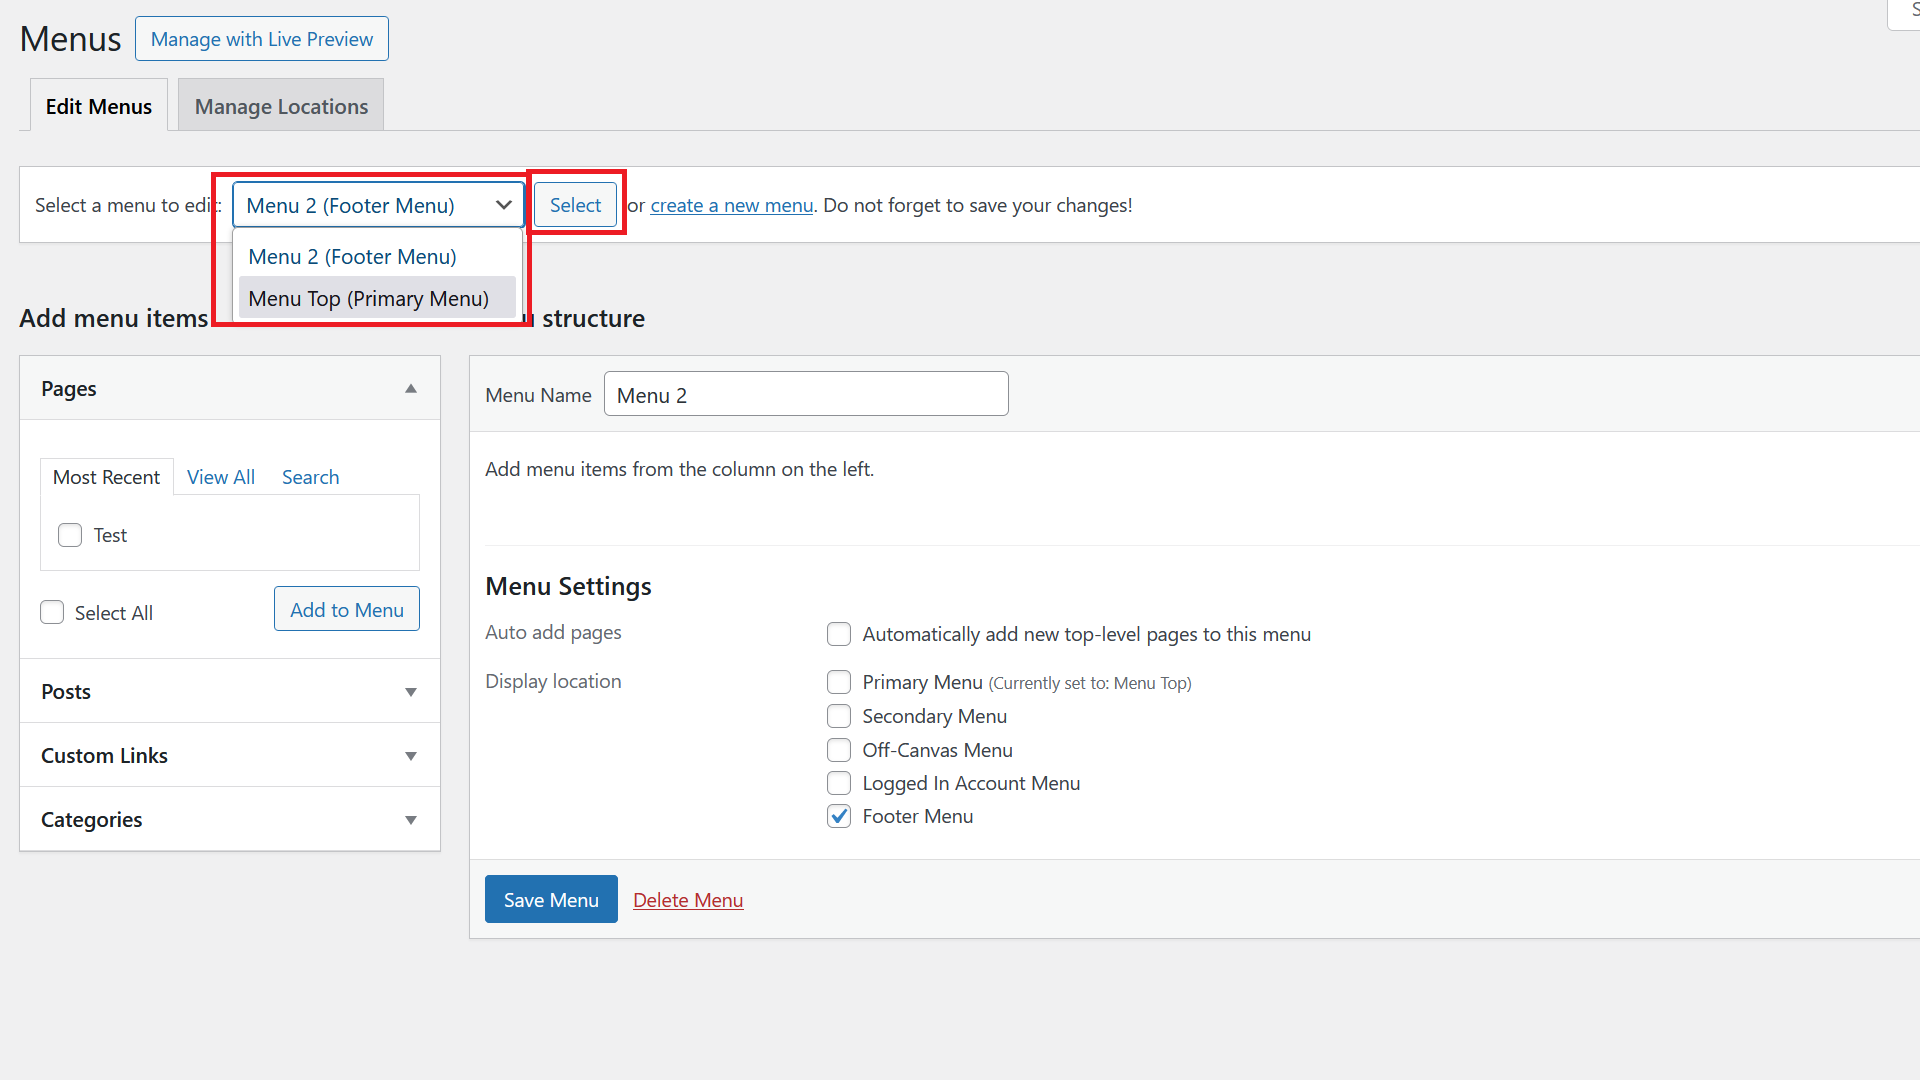
If more than one menu exists, click on the dropdown and pick the menu you want to edit. Click Select to get started.
How to Create a Dropdown Menu
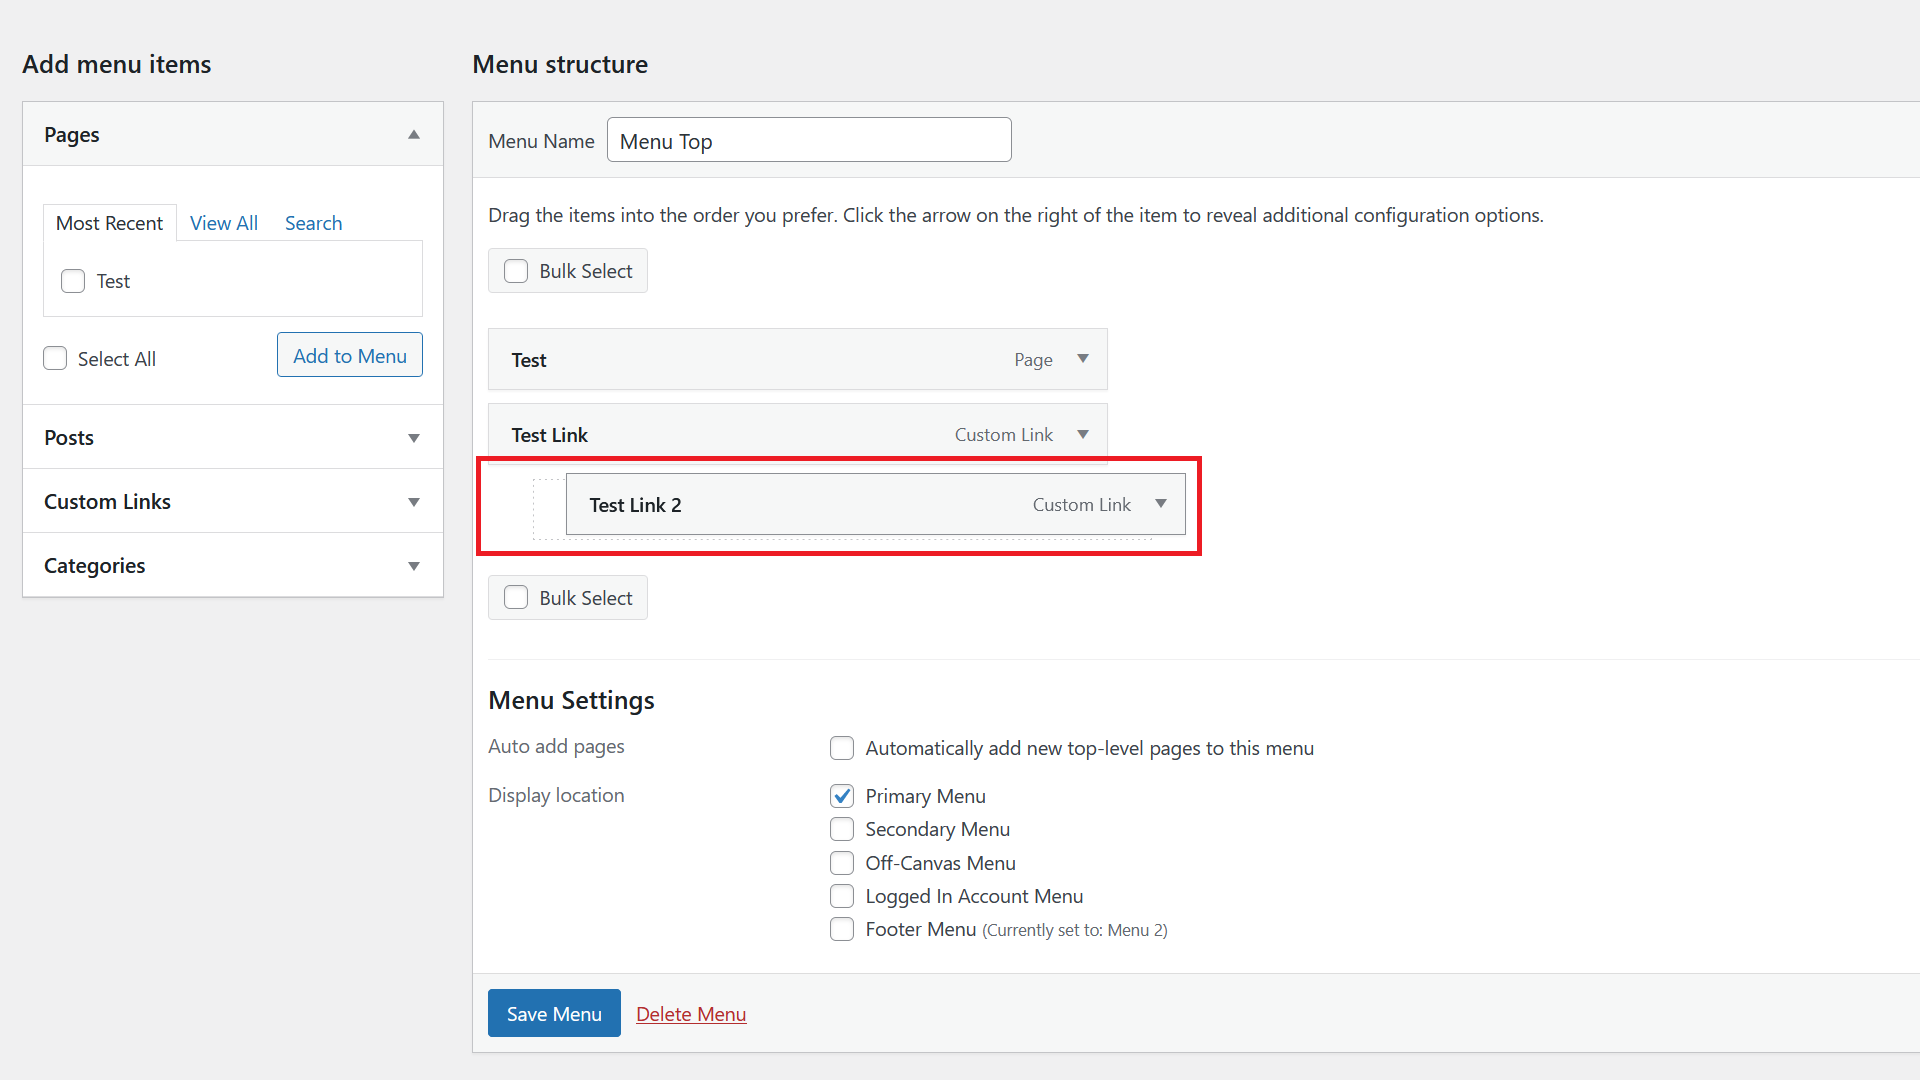
To create a submenu in WordPress, simply click on the menu item you want to have in the dropdown menu and drag it slightly to the right. You will then see a grey rectangle. Make sure that is one block inside the other menu items.
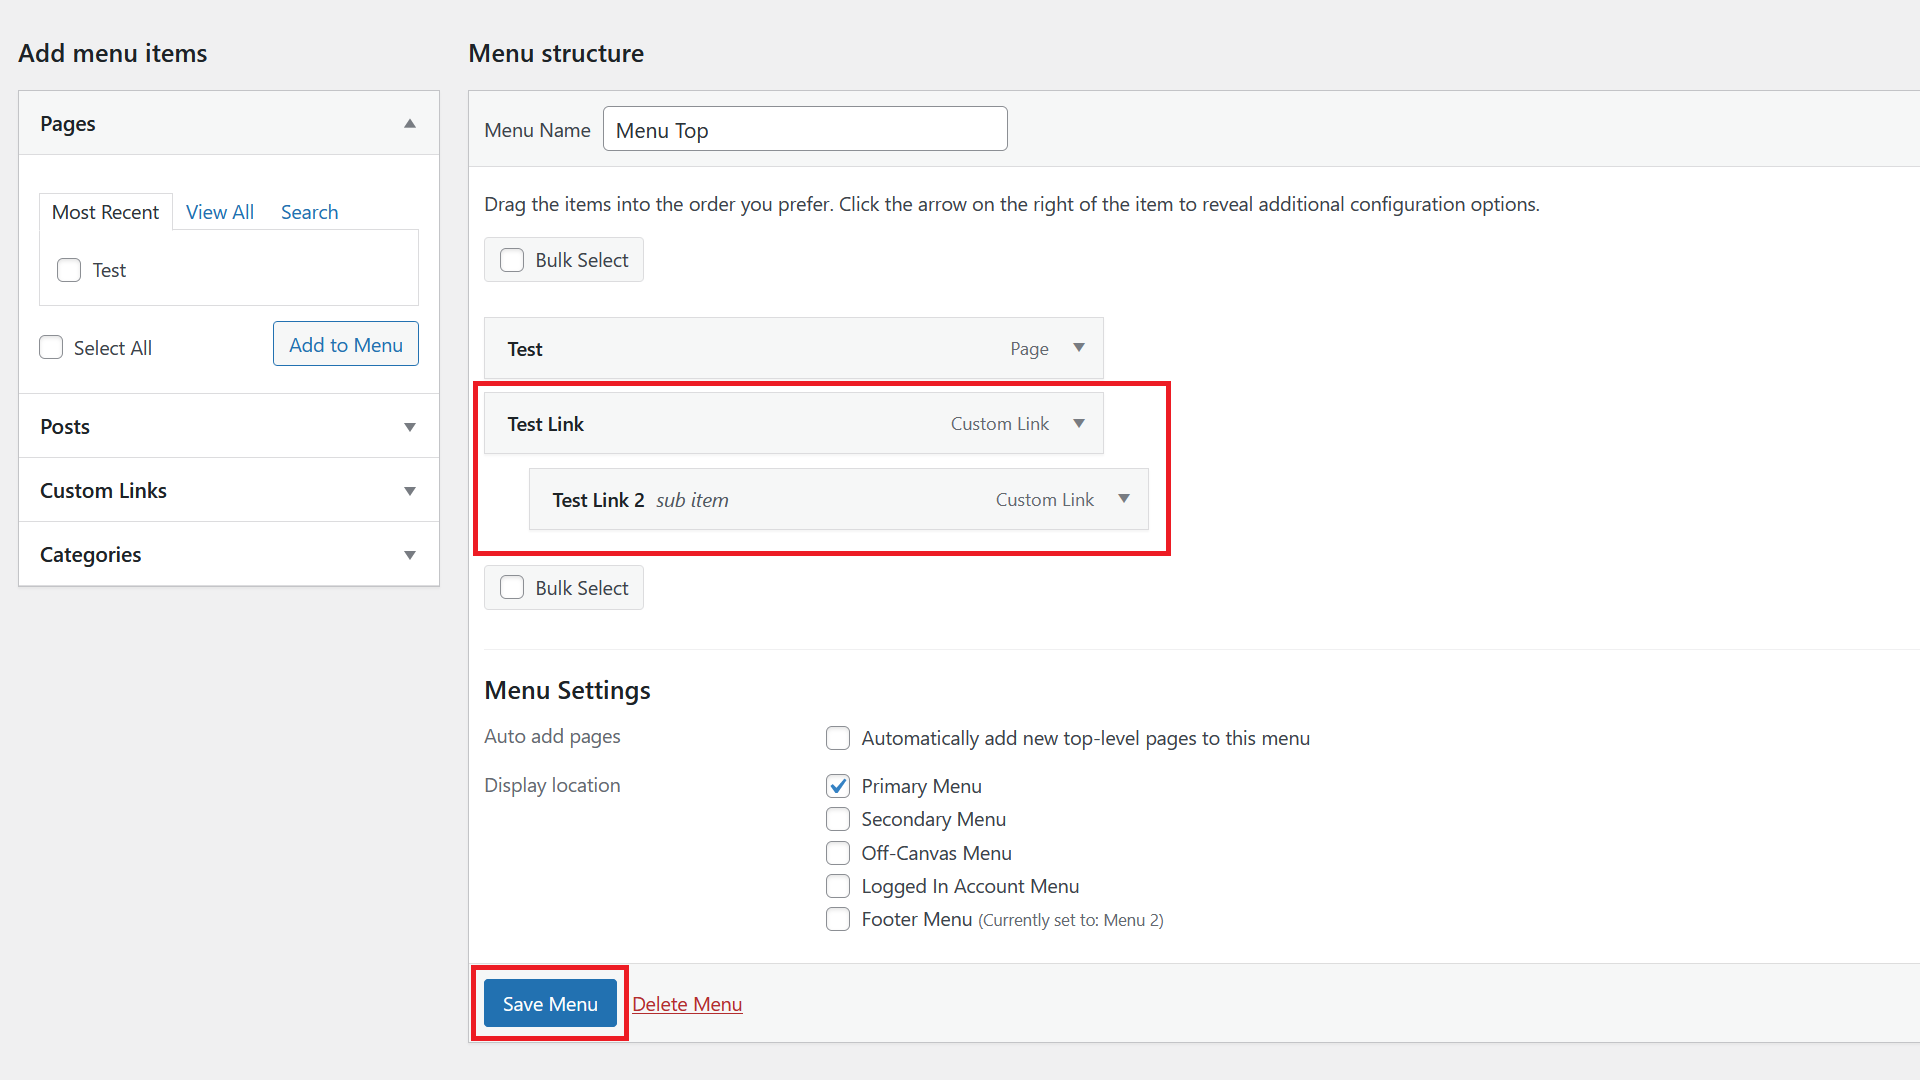
Drop it by releasing the mouse click and click on Save Menu. Depending on your theme, that should be it and you should have created a drop down menu.
How to Open Menu Link in New Tab
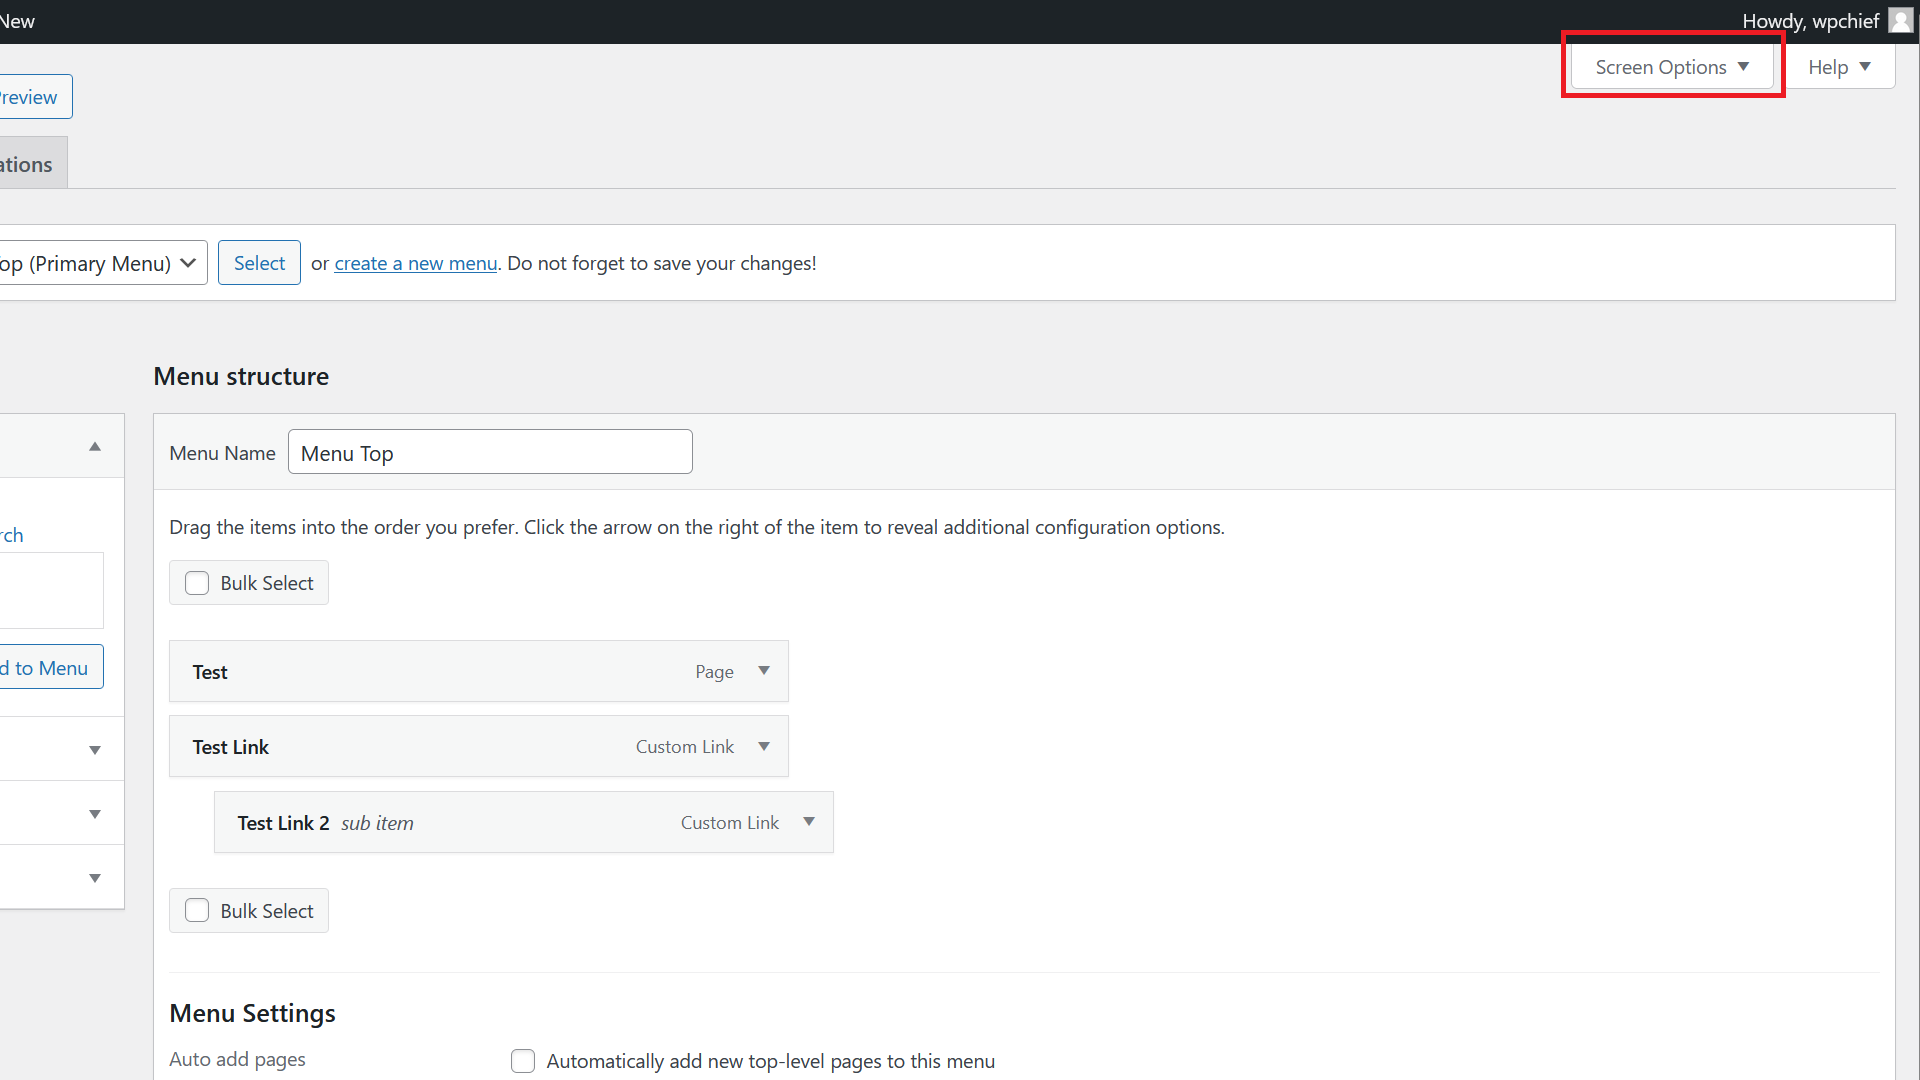
To add this option, you first have to click on Screen Options on the top right.
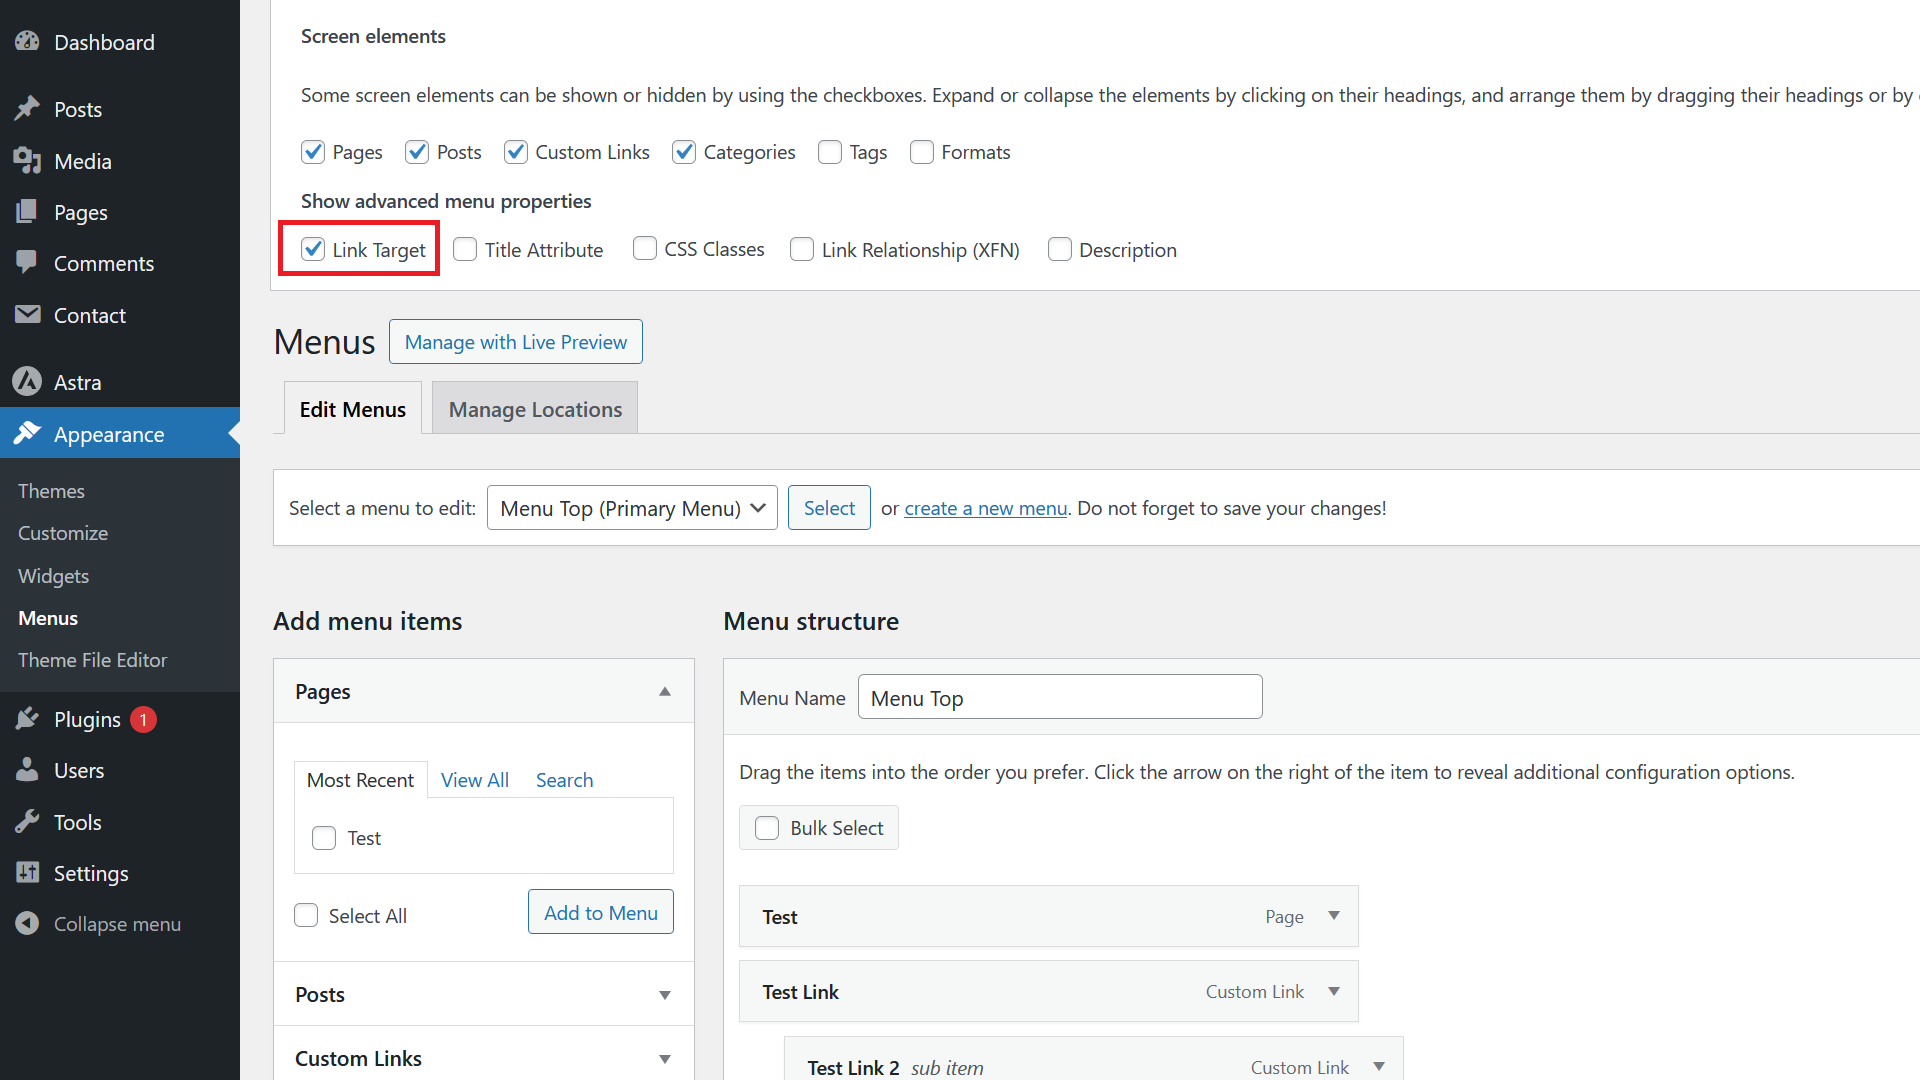
Next tick the Link Target checkbox.
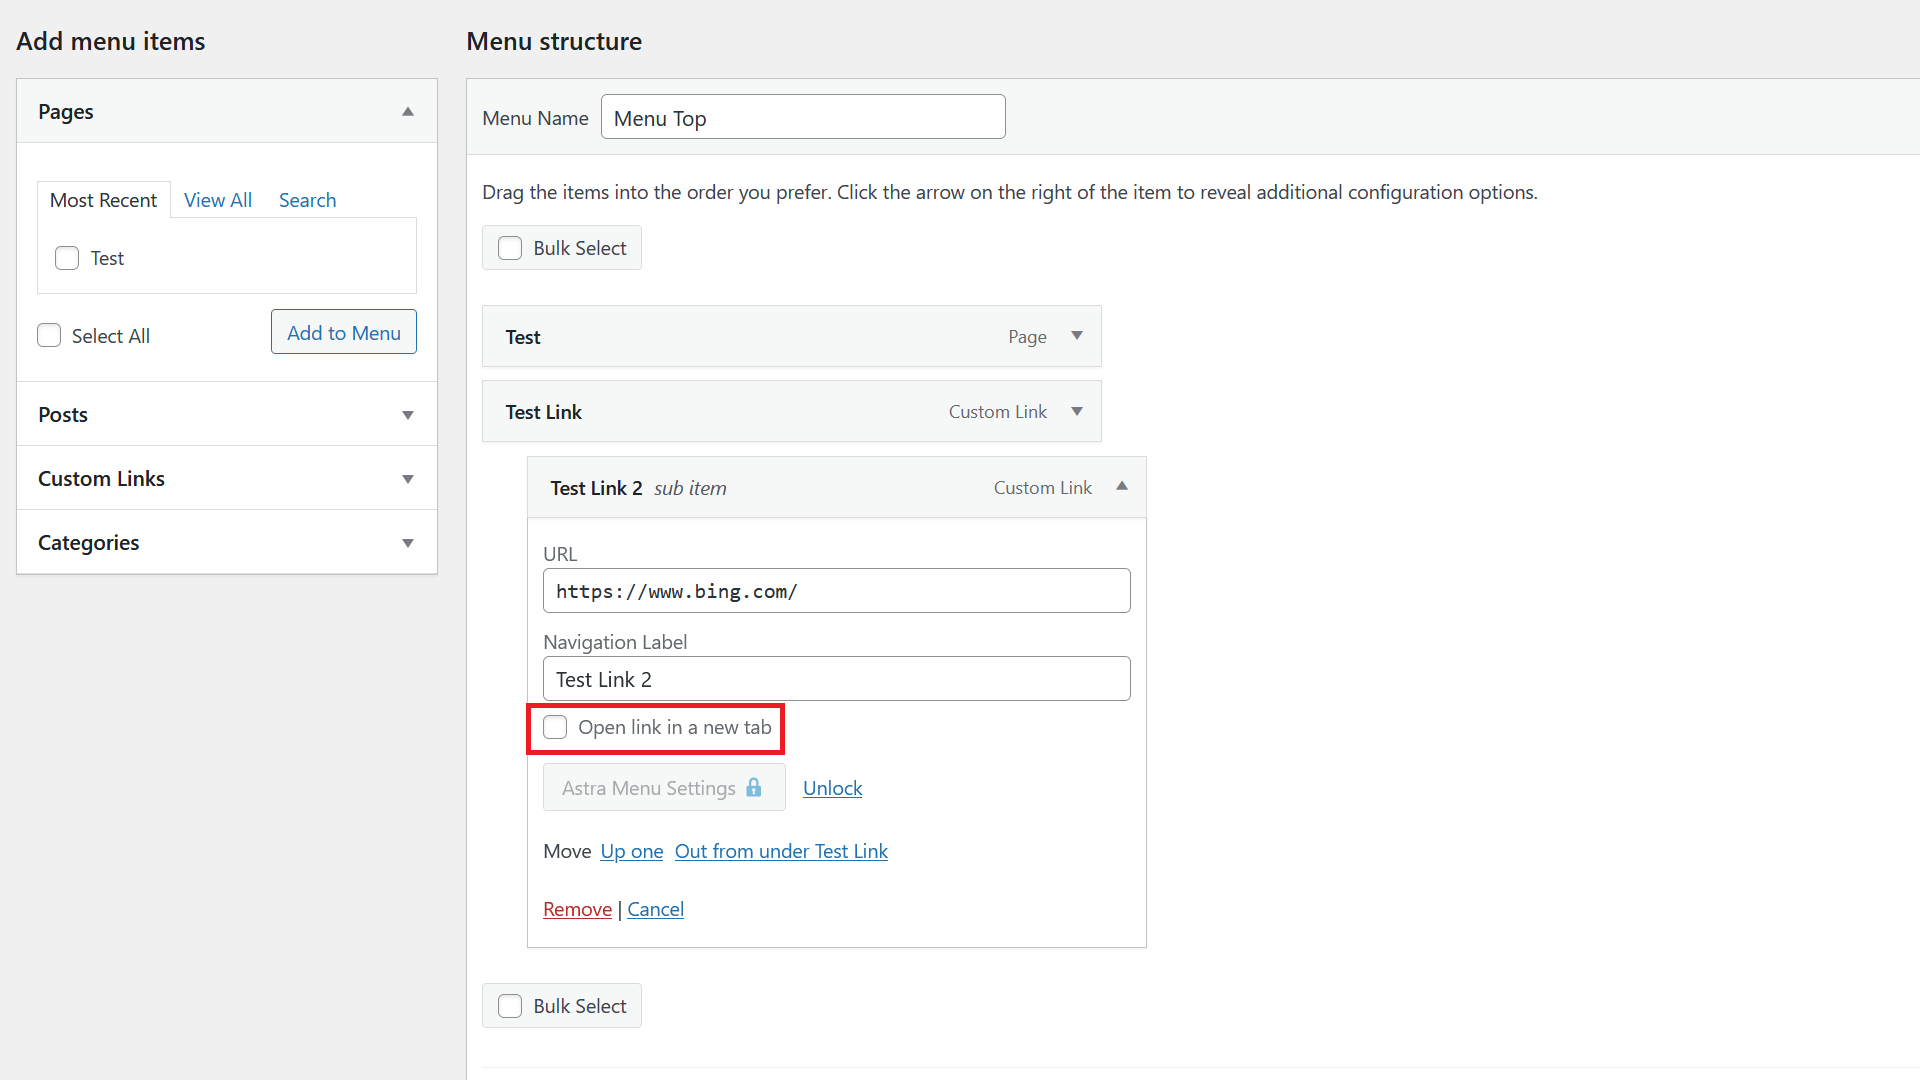
Then you should see a new checkbox for each menu item. If you tick that and save the menu, clicks on that menu item will open in a new tab.
How to Add a CSS Class to Menu Items
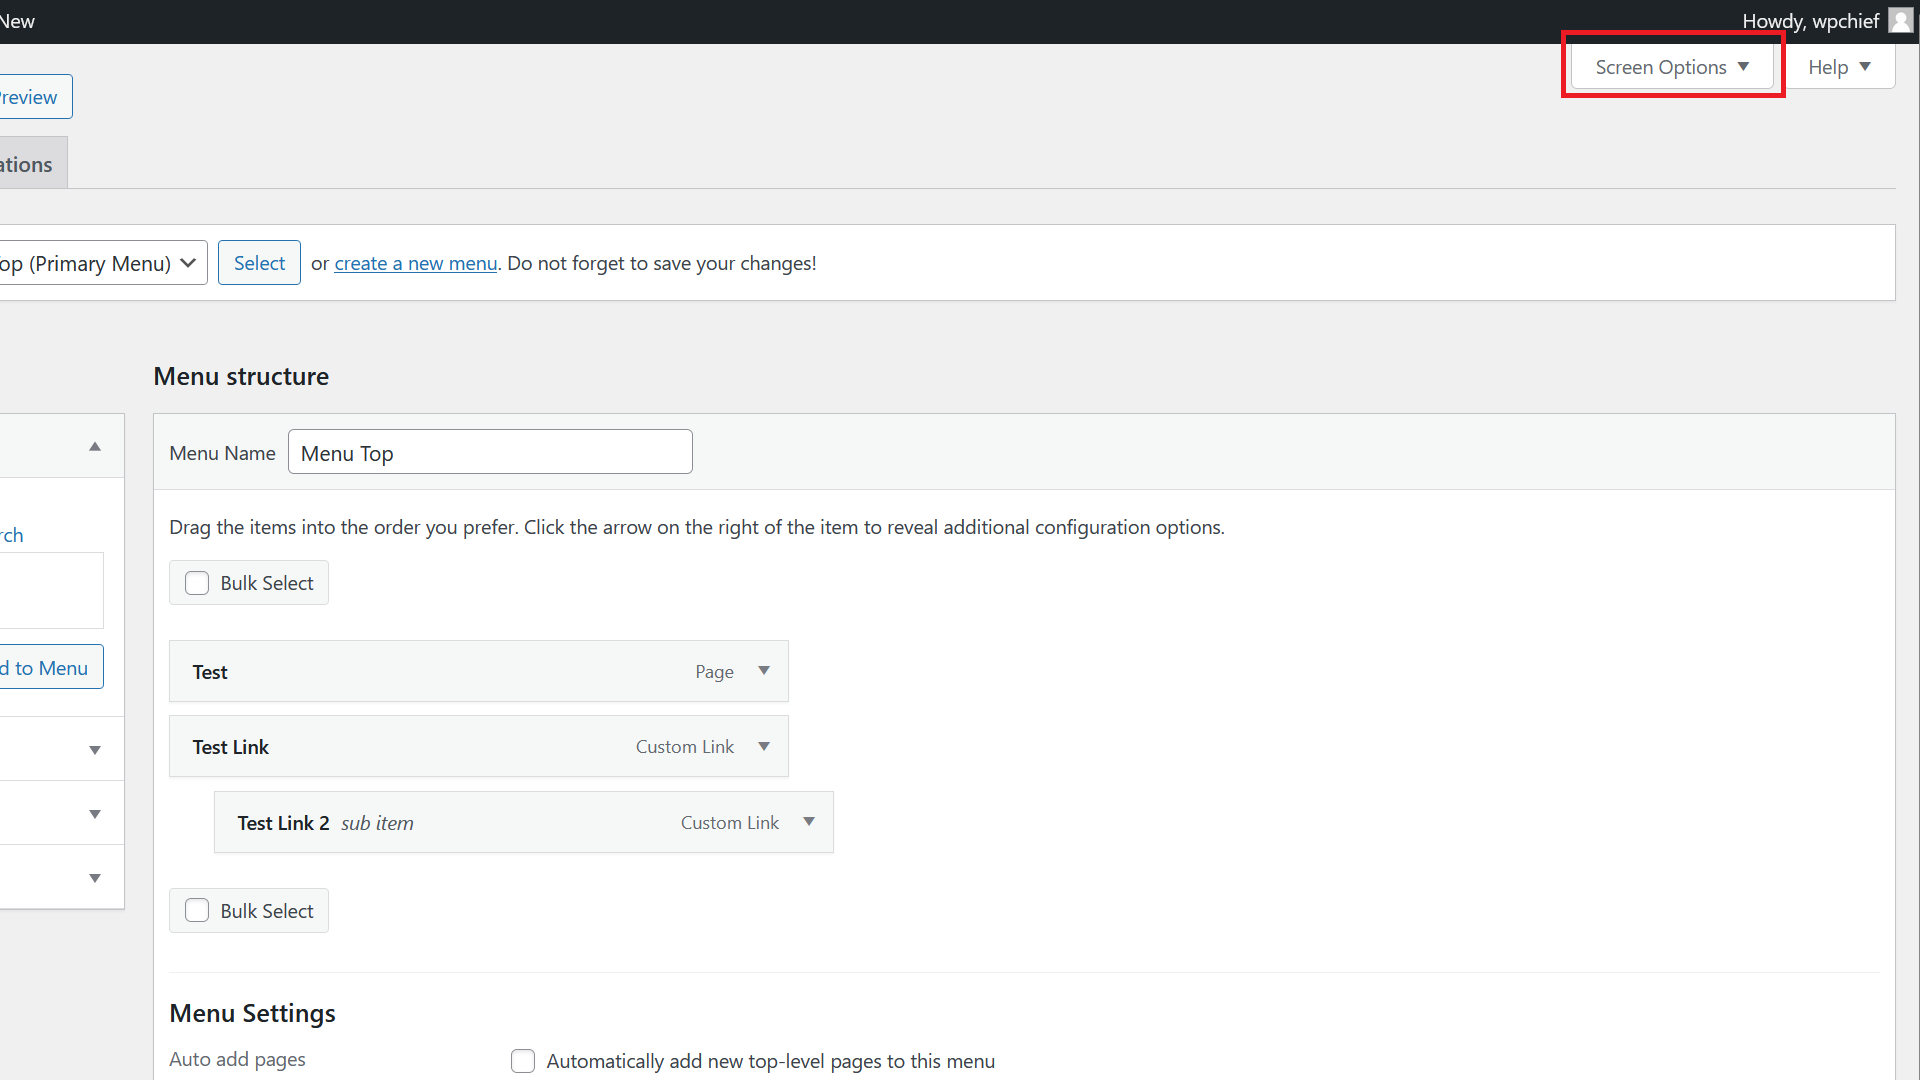
To add this option, first click on Screen Options on the right top of your screen.
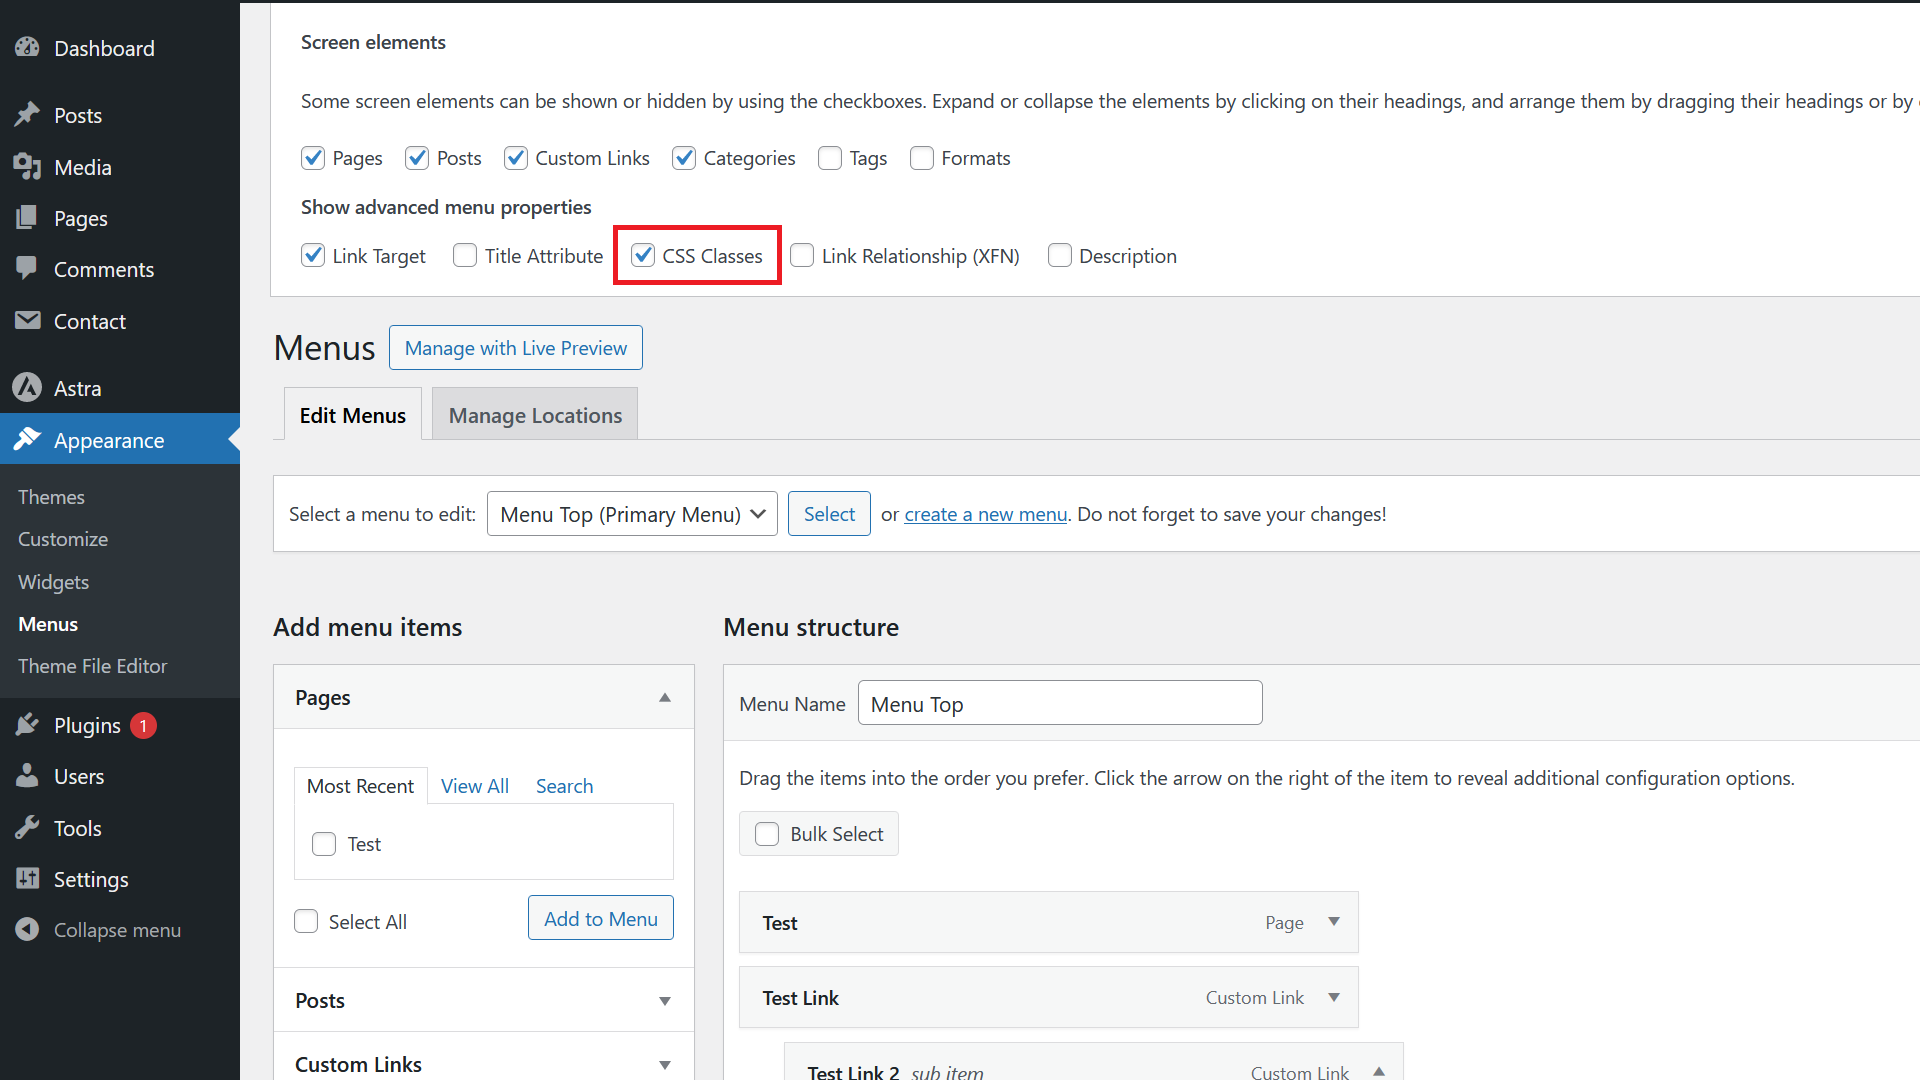
Next tick the CSS Classes checkbox.
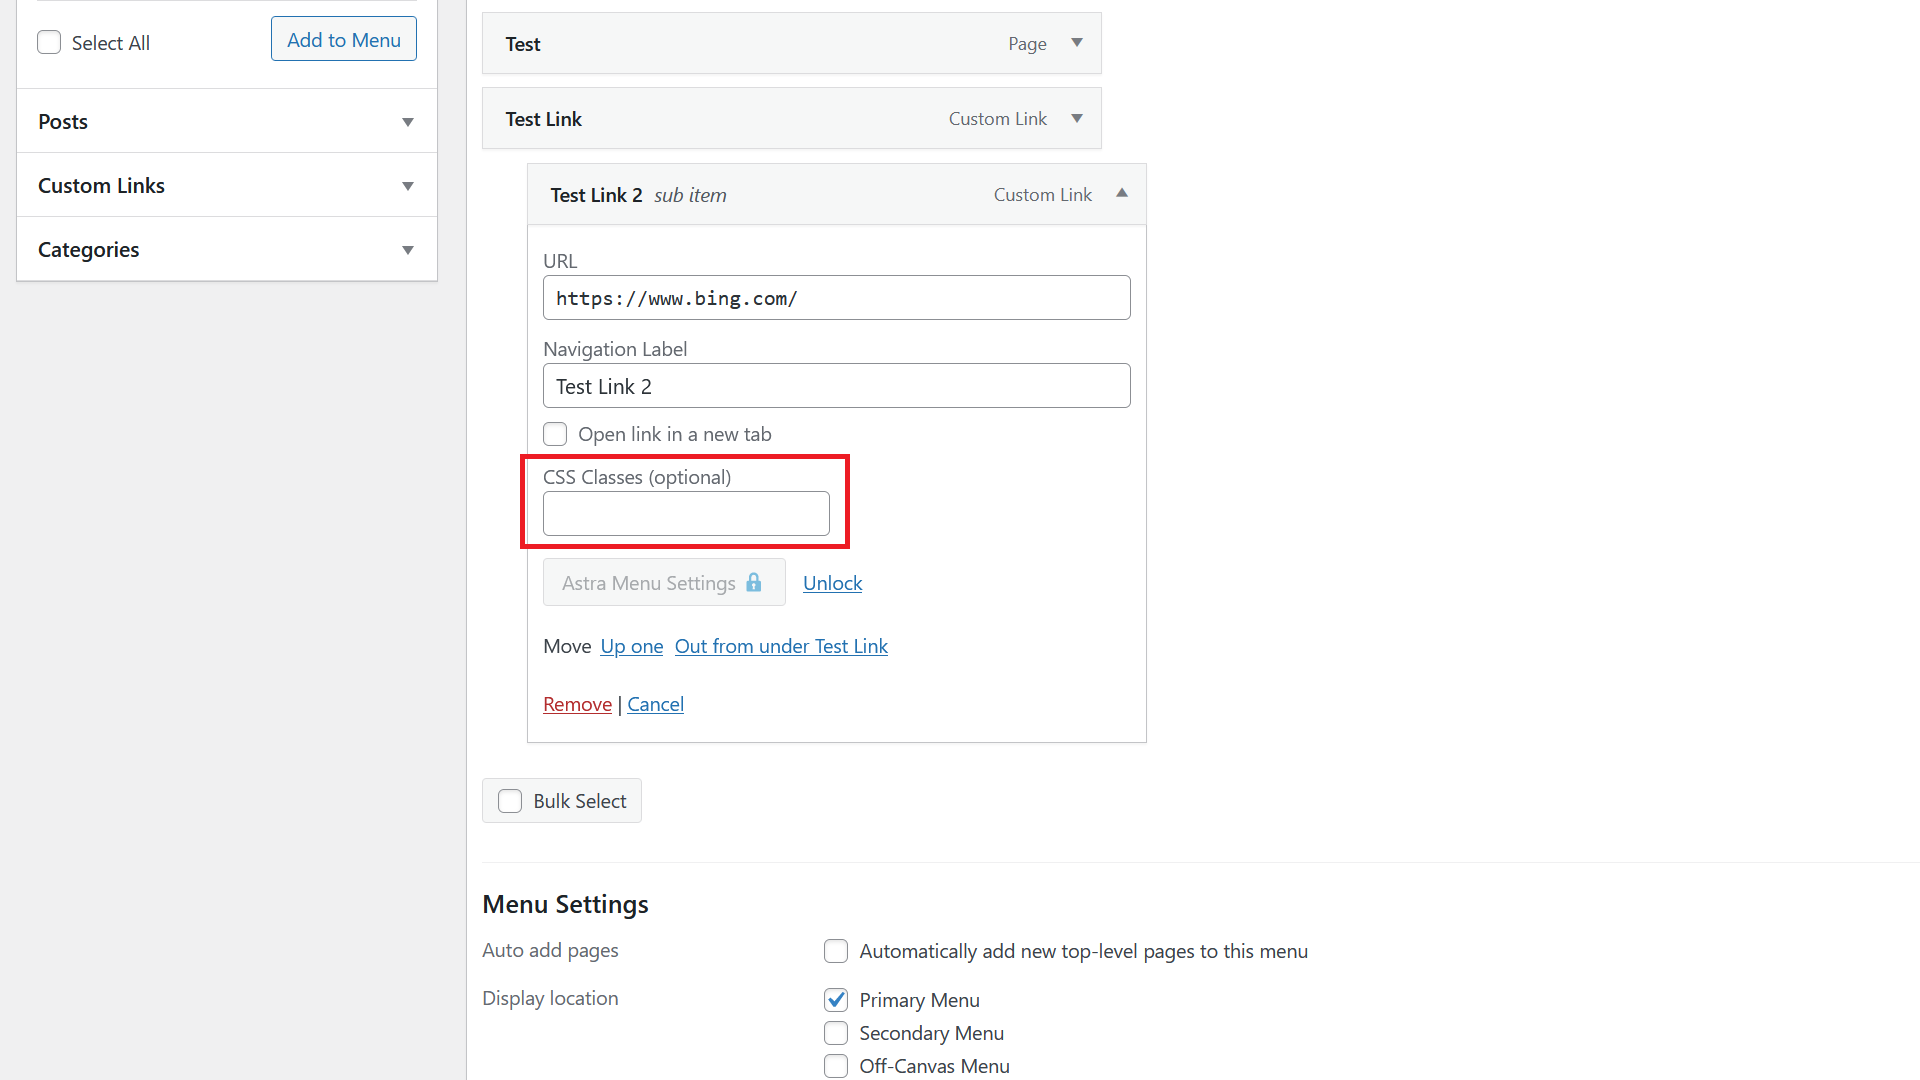
You should then see a CSS Classes textbox appear for each menu item where you can add as many CSS classes as you want.
How to Edit Menu Color and Fonts in WordPress
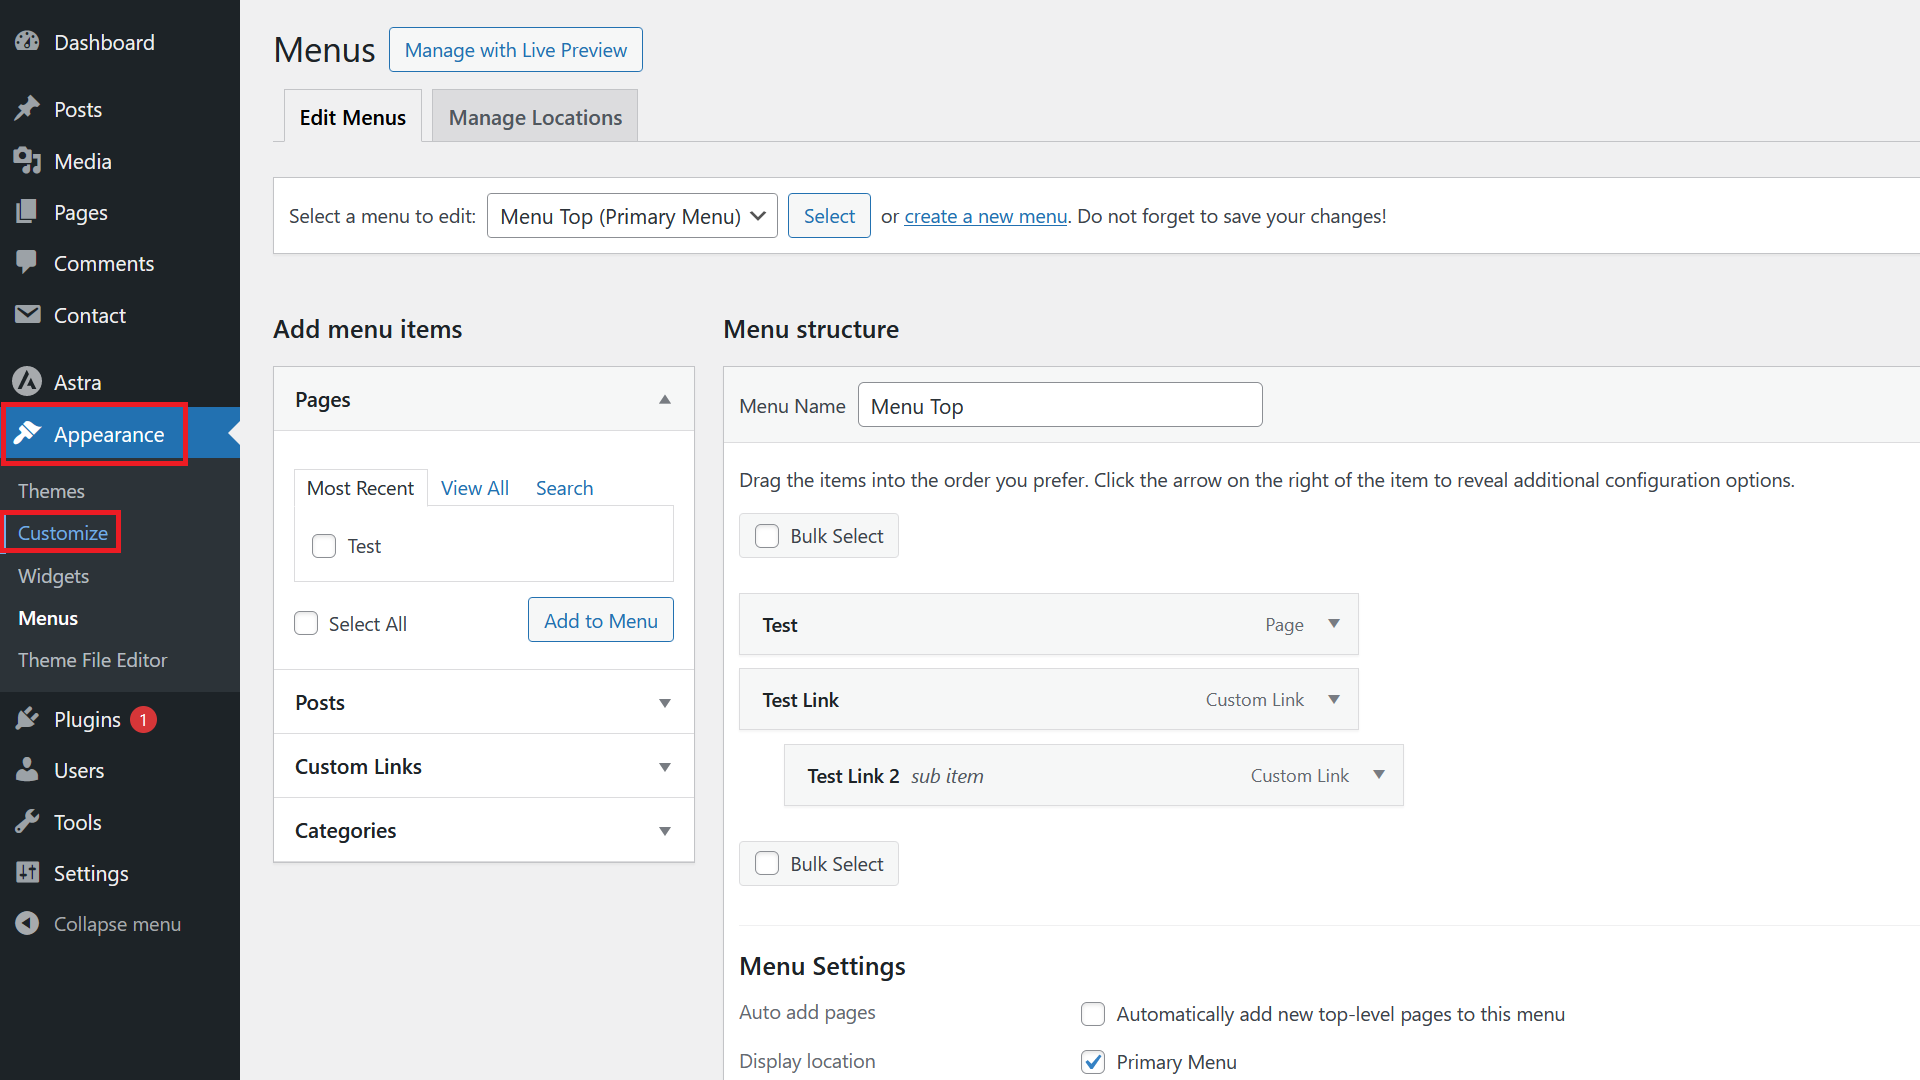
This depends very much on the theme you are using. Usually, menu font and color can be adapted in the Appearance / Customize section. However, that’s not a given. If you can’t work it out, you might have to use CSS to make the changes you want.

