A few years back, WordPress started to automatically deliver and execute update of the WordPress system. This has the advantage of ensuring that WordPress is always up-to-date and therefore as secure as possible. However, sometimes, those updates can fail or cause problems with PHP versions or other dependencies. As a result, it might be wise to deactivate automatic core updates. This tutorial shows you 3 ways to do that.
What is covered:
First: Backup
Before you do anything, make sure you backup your WordPress website so you can revert to the current version of your website should something go wrong. With that said, here we go:
Switch to Maintenance and Security Releases Only
This option allows you to only automatically install security and maintenance updates, not updates containing new features.
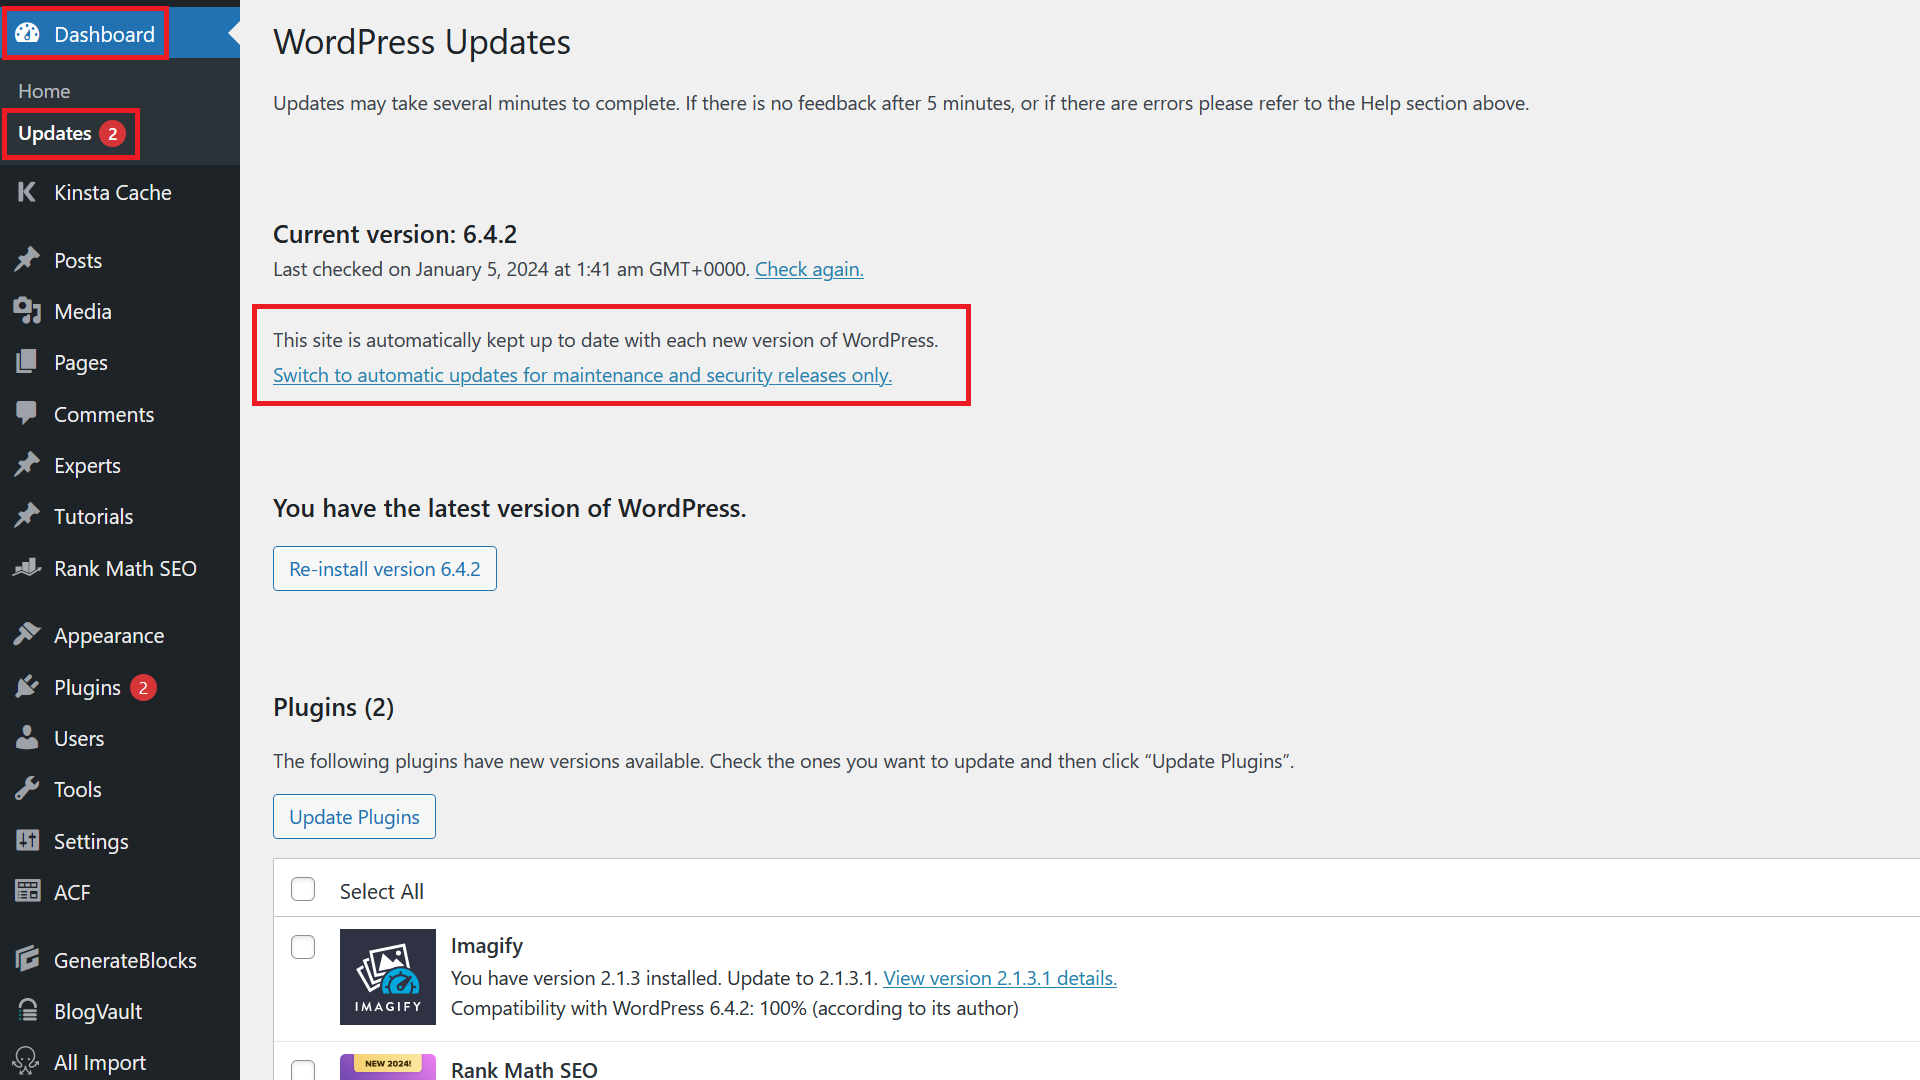
To switch, go to Dashboard / Updates. Under Current version you can find a long link that allows you to switch to updates for mainentance and security releases only.
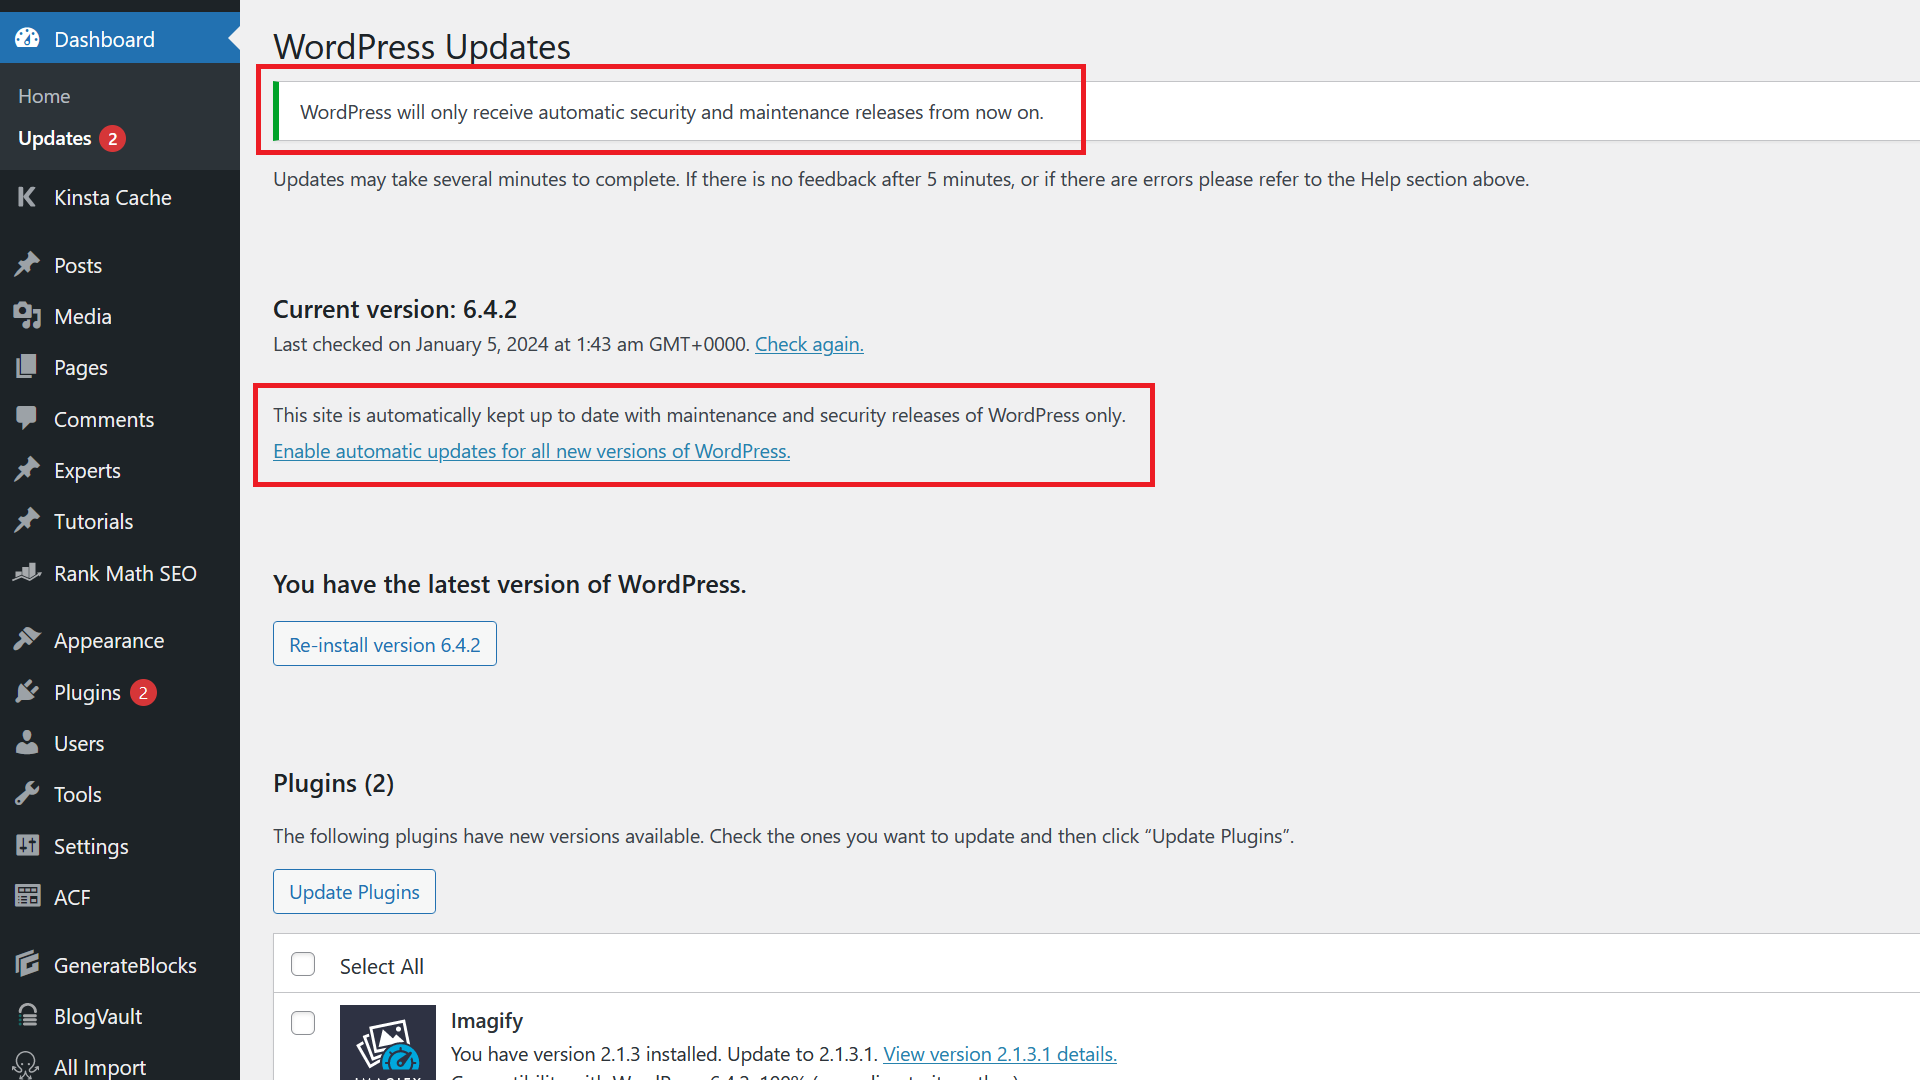
When you click on it, the setting will be switched. You will then have to install big updates manually through the backend while smaller security updates will be installed automatically.
This makes problems caused by automatic updates less likely, however, still possible. As a result, I suggest you should completely disable automatic updates and do them manually after making a manual backup.
Using the Easy Updates Manager Plugin
This plugin allows you to manage, how the WordPress core (WordPress itself), themes and plugins are updated.
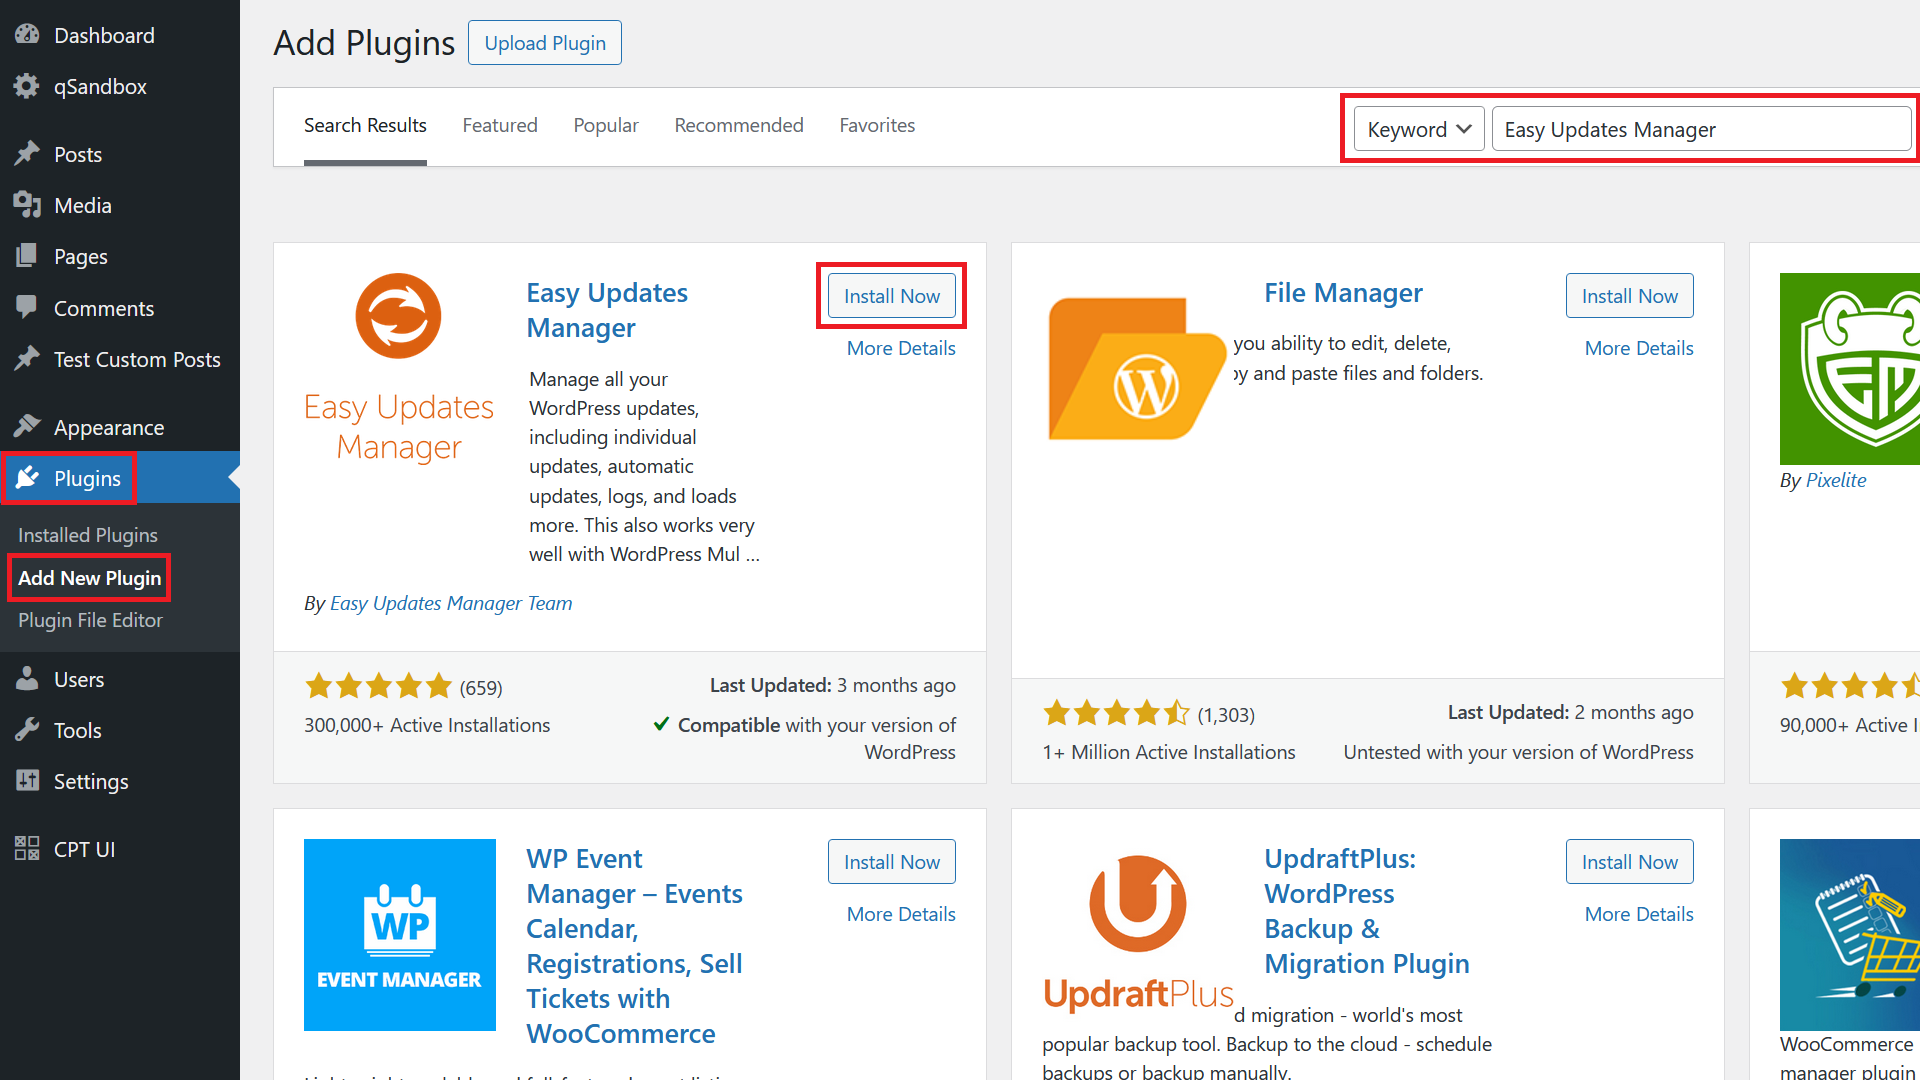
To install the plugin, go to Plugins / Add New Plugin. Then search for Easy Updates Manager and click Install Now.
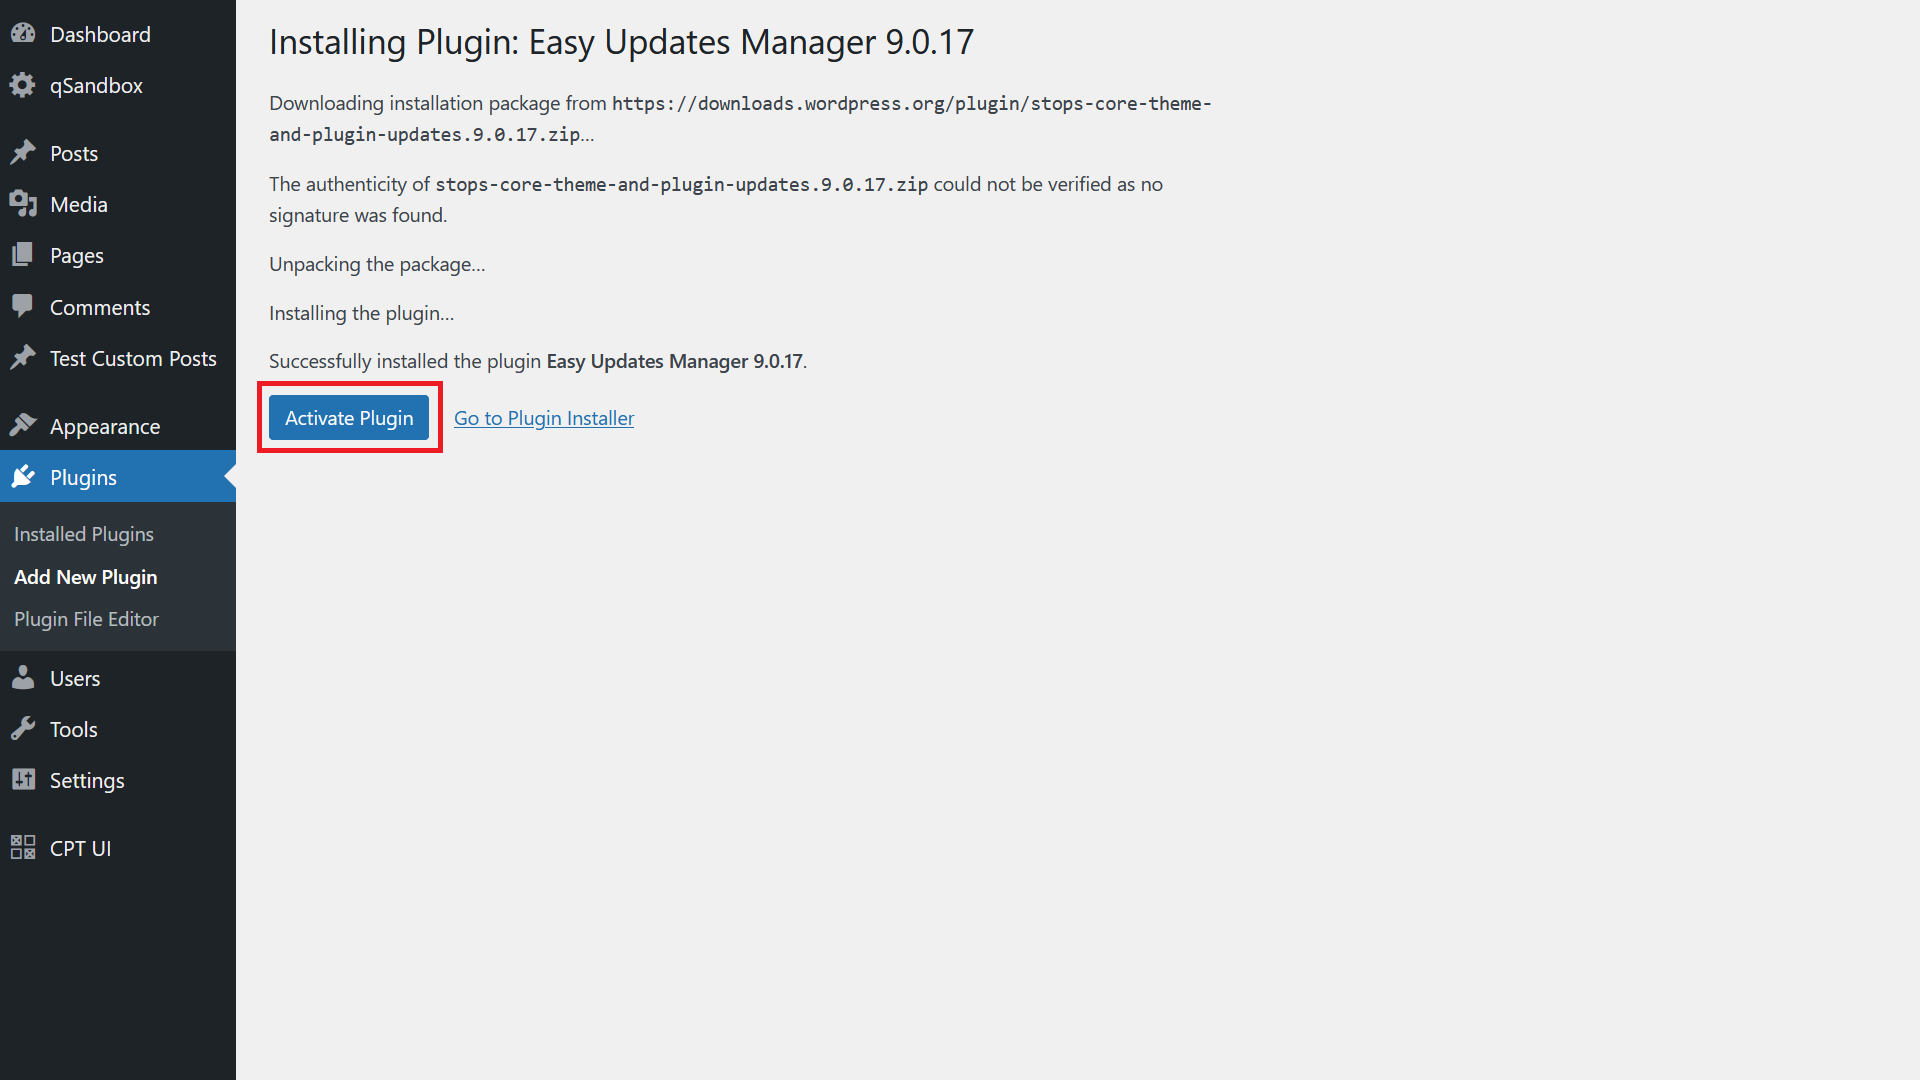
Activate the plugin.
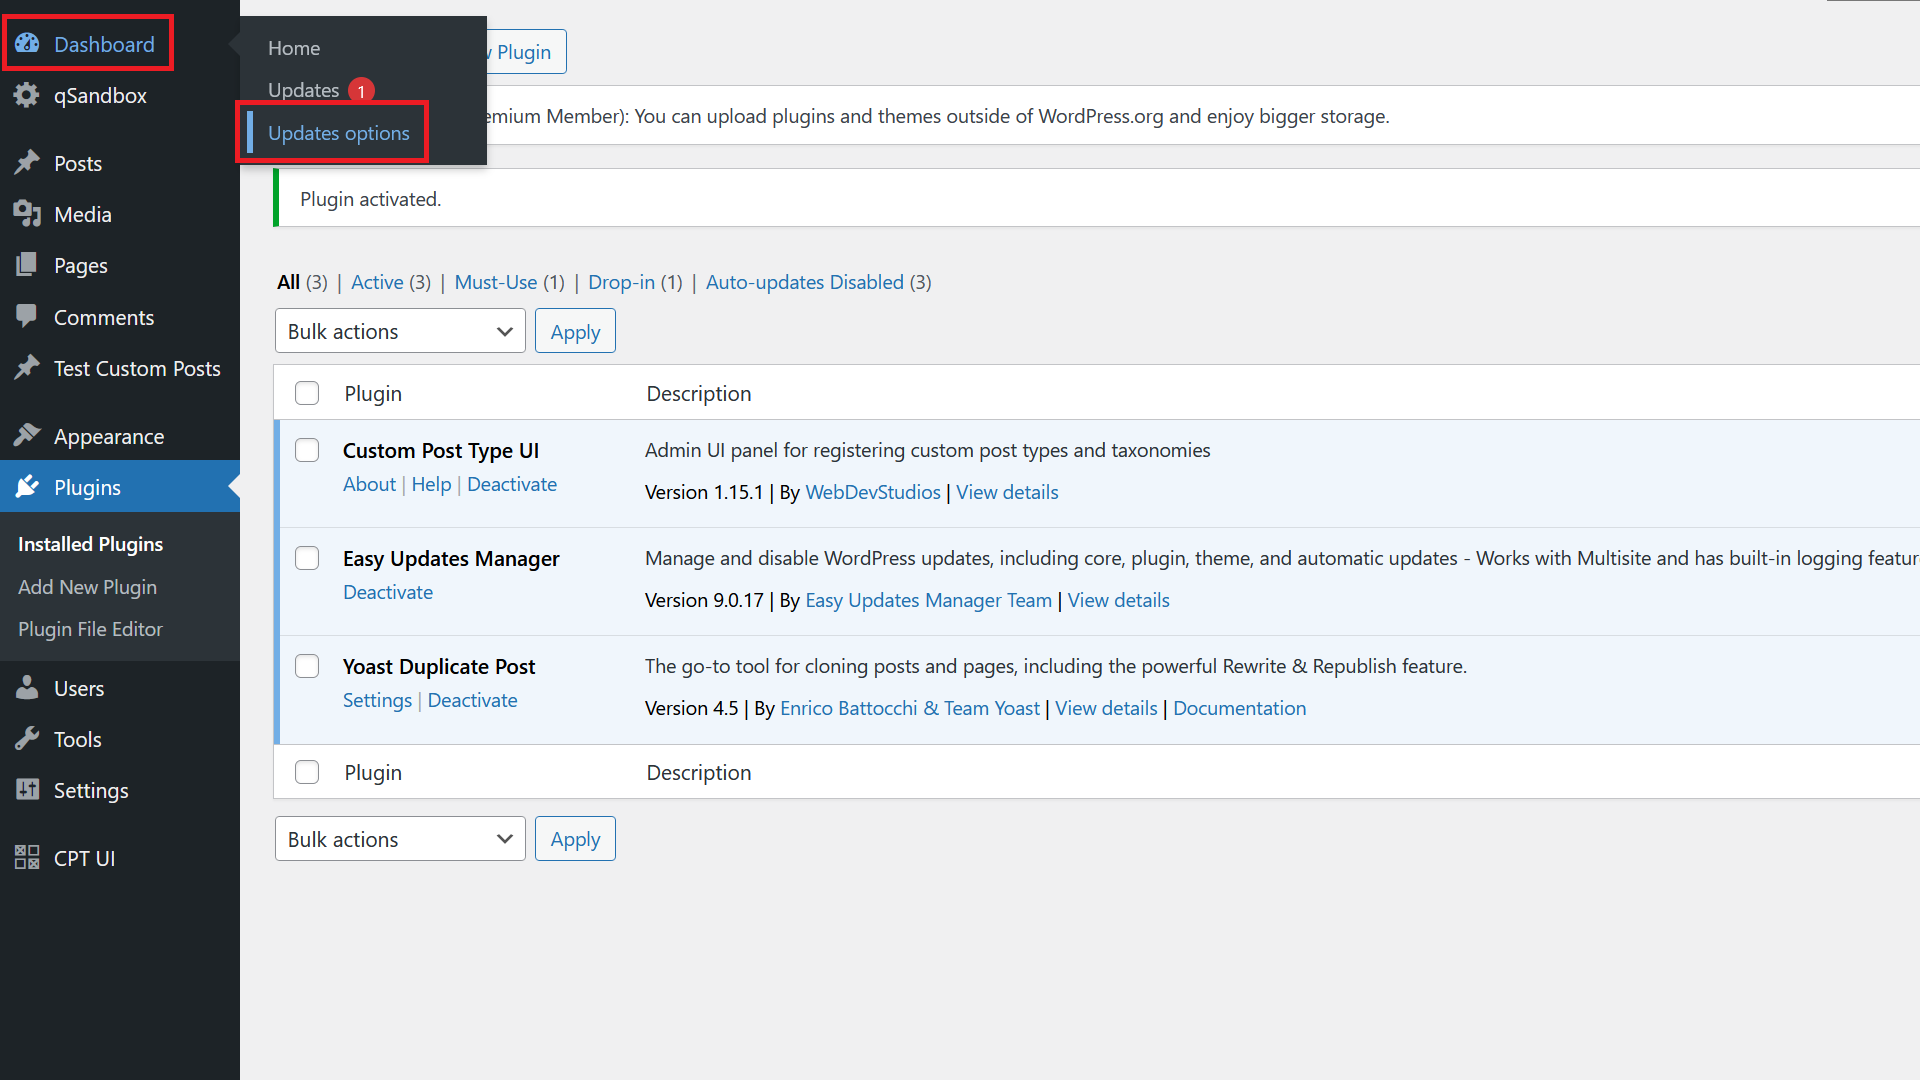
Then on the left top, go to Dashboard / Updates options.
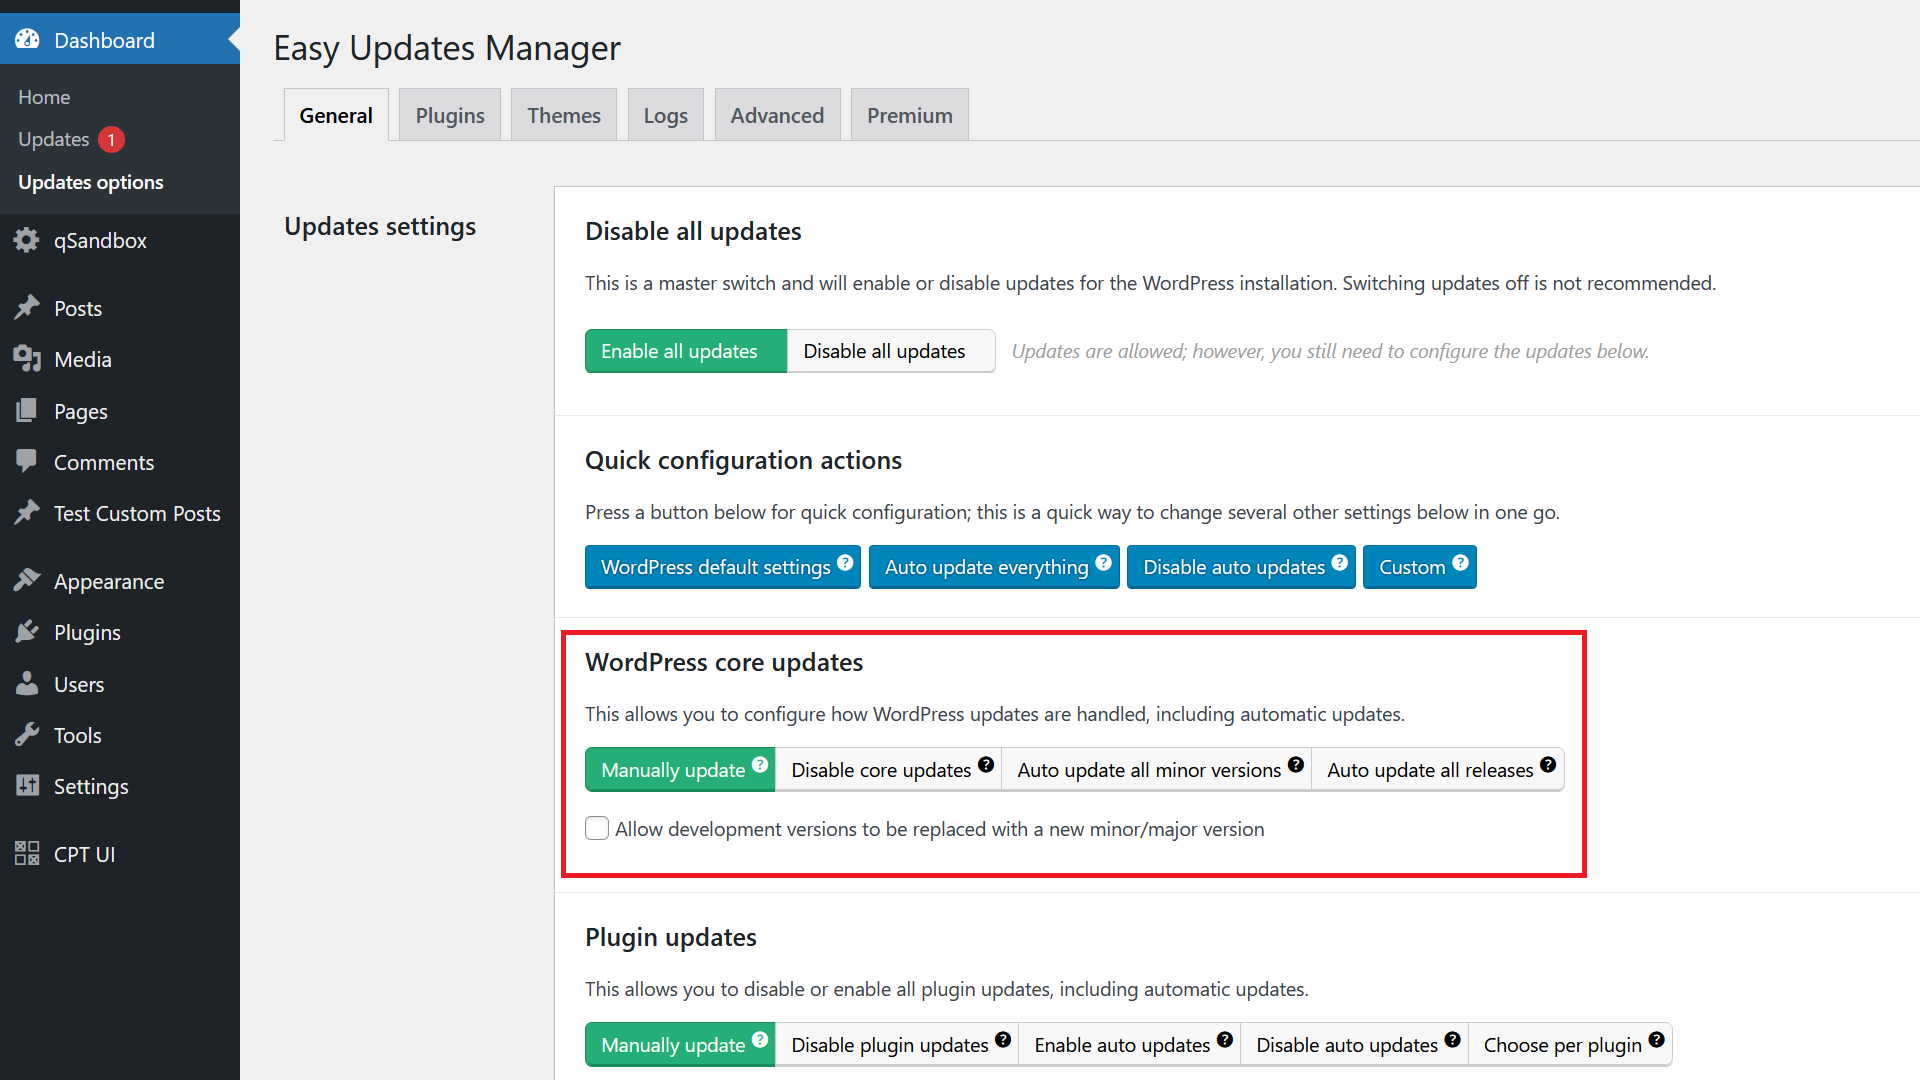
There you then want to make sure that in the WordPress core updates the Manually update switch is green.
Automatic Updater Disabled in WP-Config.php
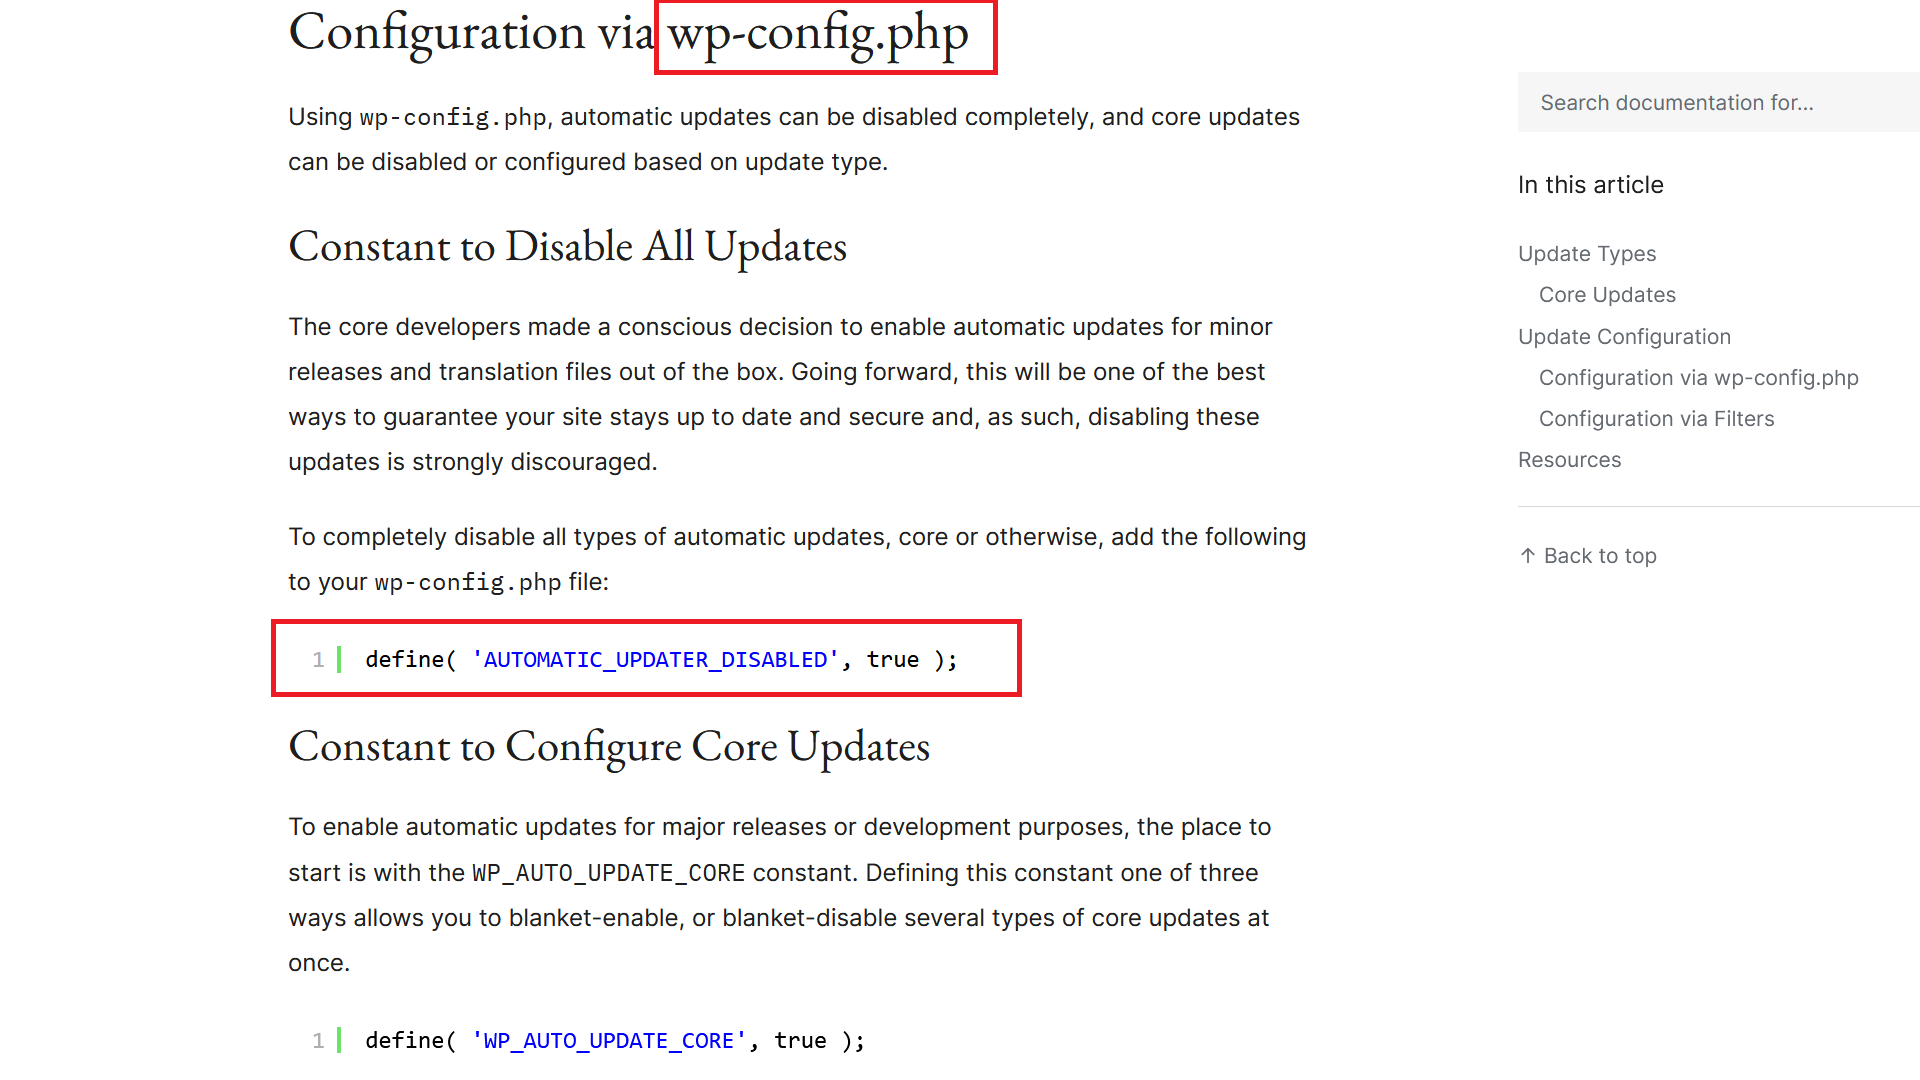
This is the best way to solve this problem, but also the most technical, that’s why I list it last. To do this, you have to download the wp-config.php file from the root folder of your WordPress installation (ideally via SFTP). Then you have to add the following line of code:
define( 'AUTOMATIC_UPDATER_DISABLED', true );Then re-upload the changed file to your server. You can find more information on this here.
A lot can go wrong in that sequence, so make sure you have a backup in place.
If you don’t feel comfortable doing this, maybe look for a developer to help. Or simply go with the plugin solution above which is perfectly fine and shouldn’t materially slow your website down.

